ANTIETAM/SHARPSBURG 1862 in 6MM (XI and last!)

Visits: 47

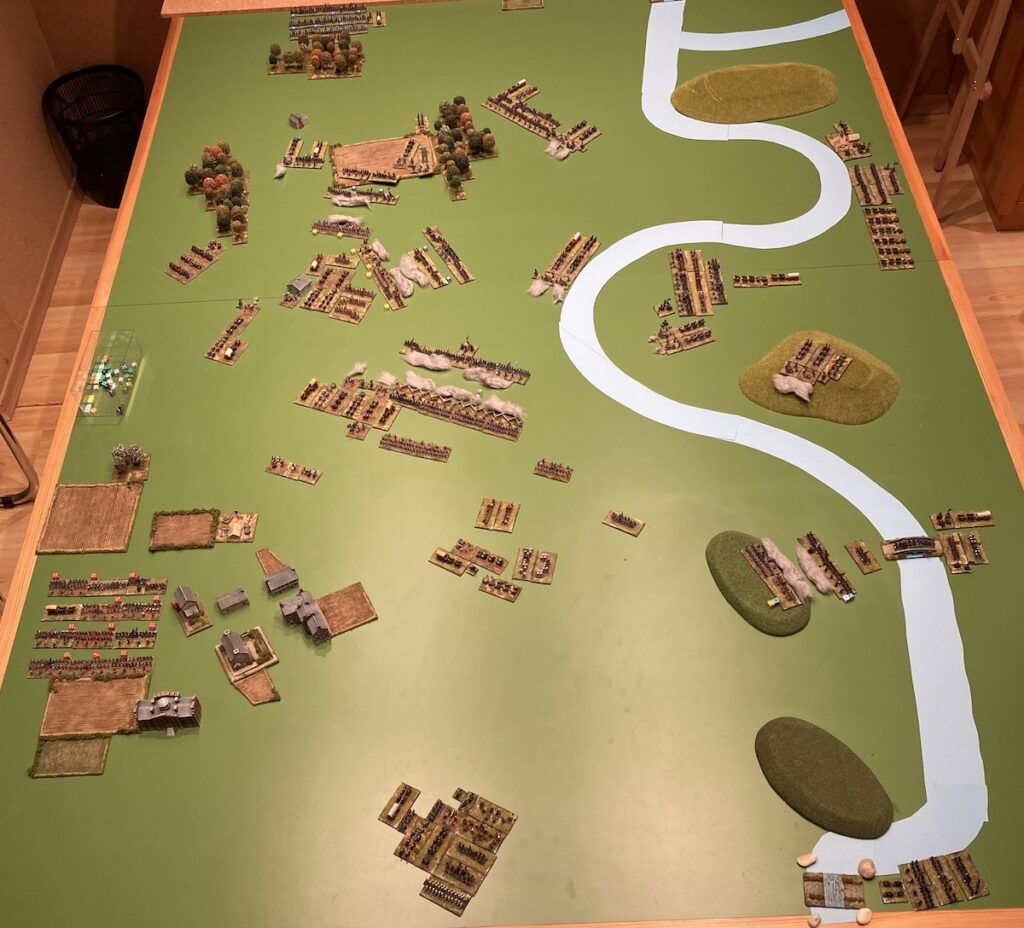
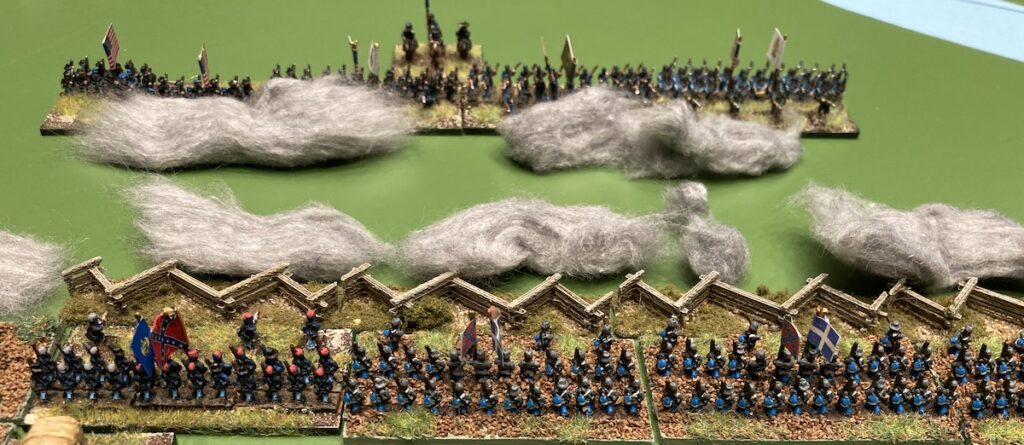
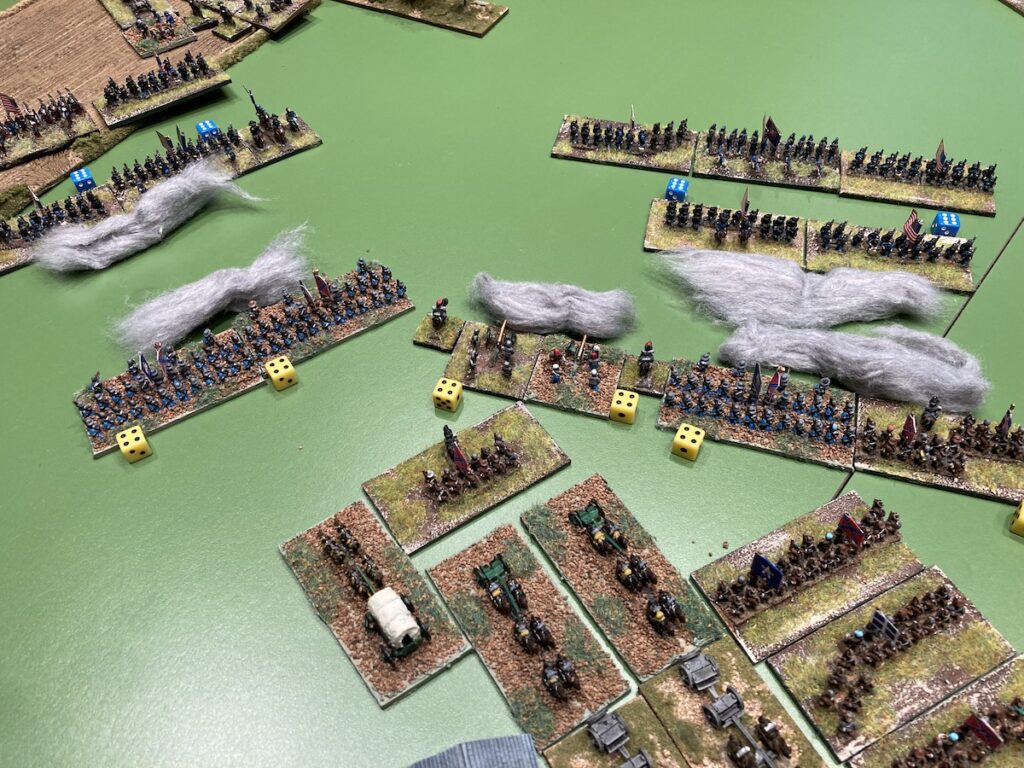
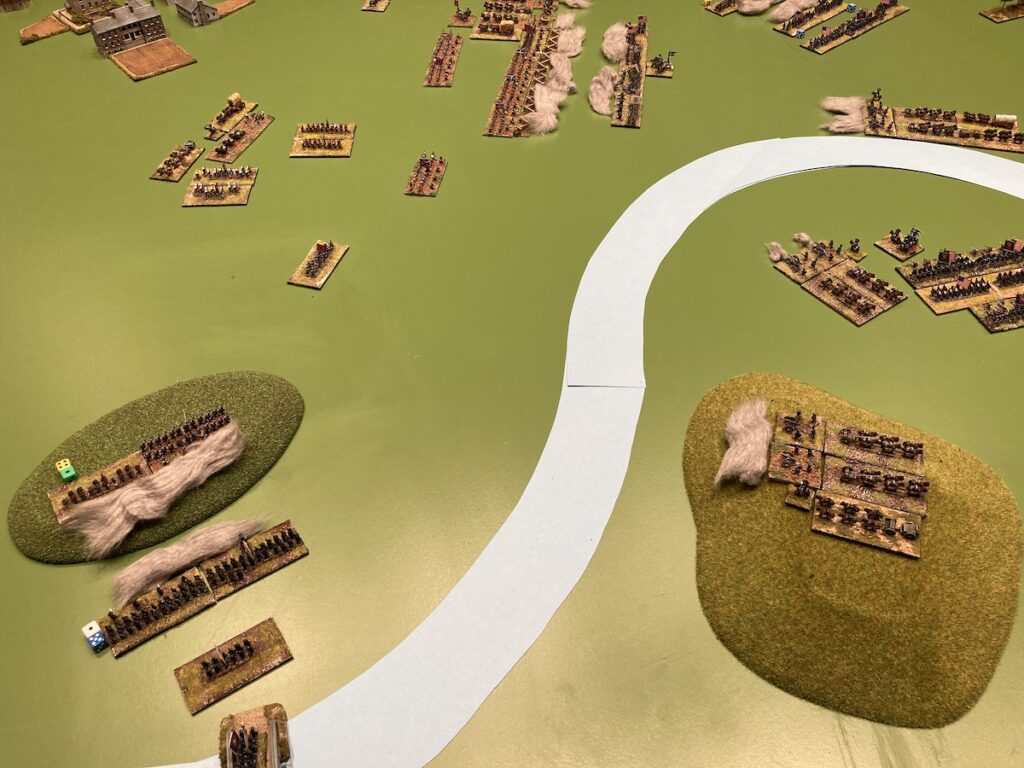
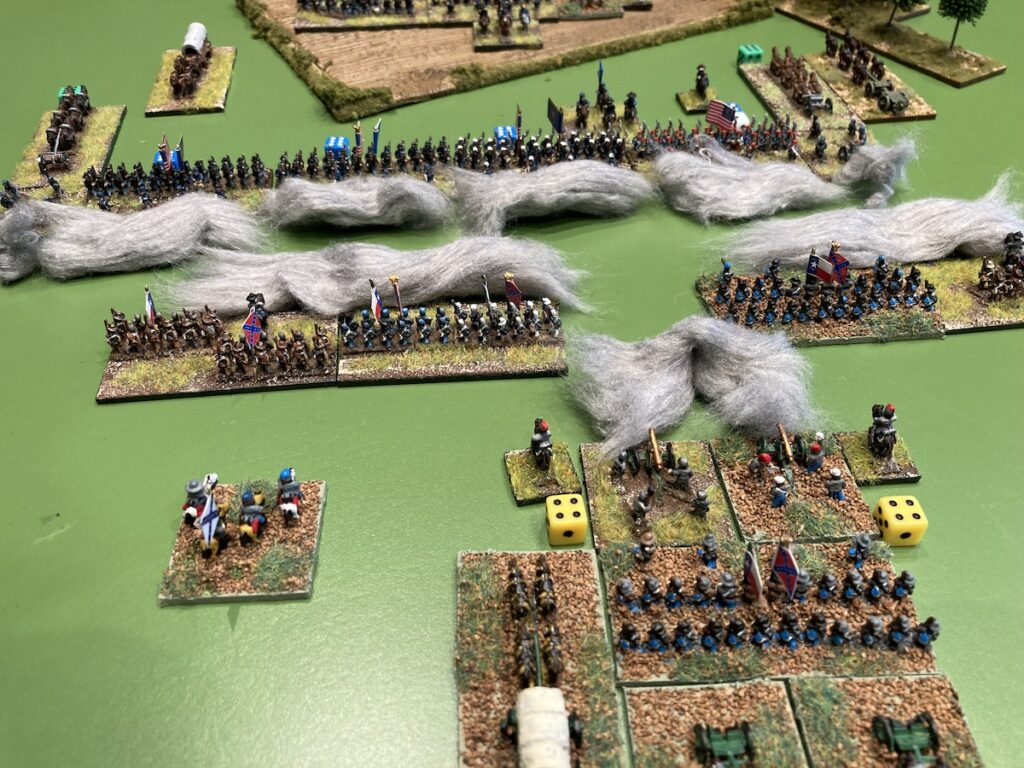
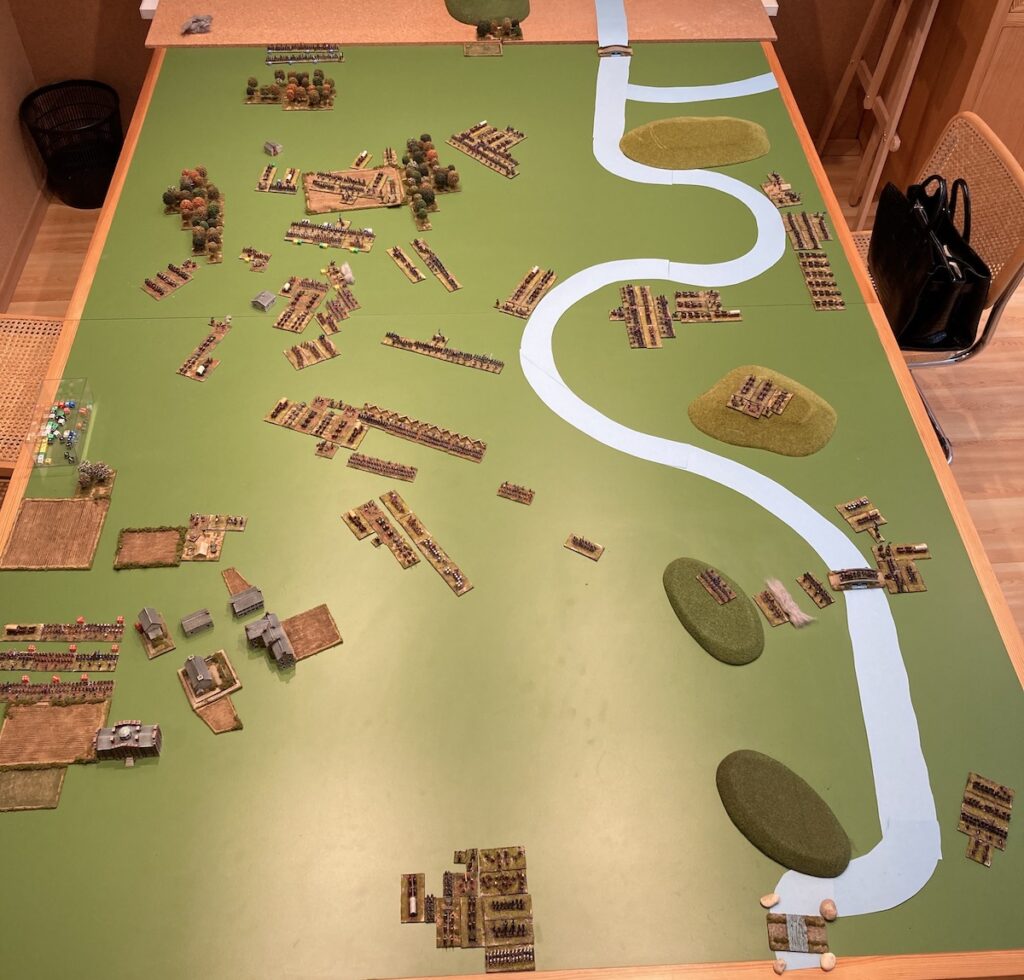
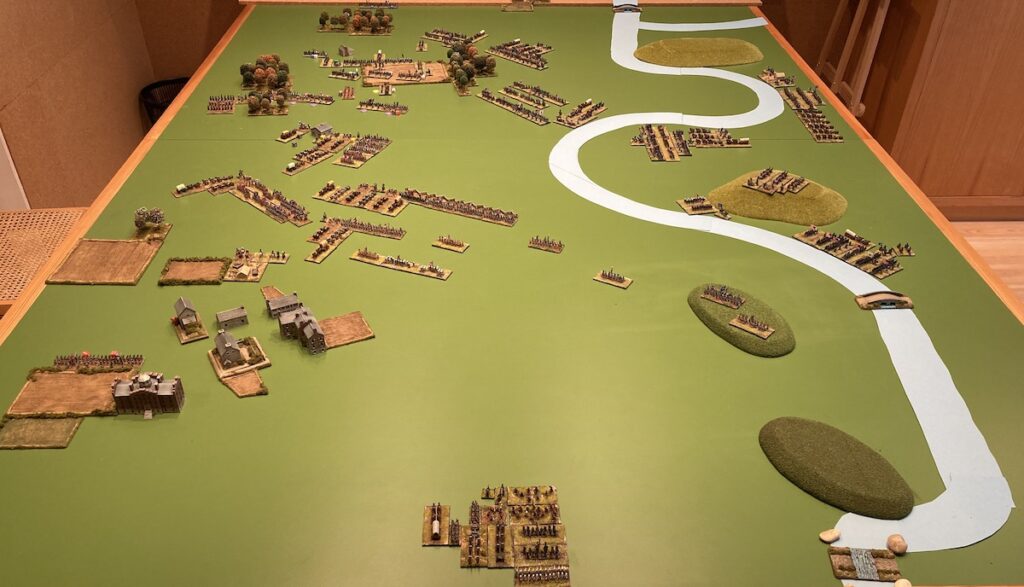
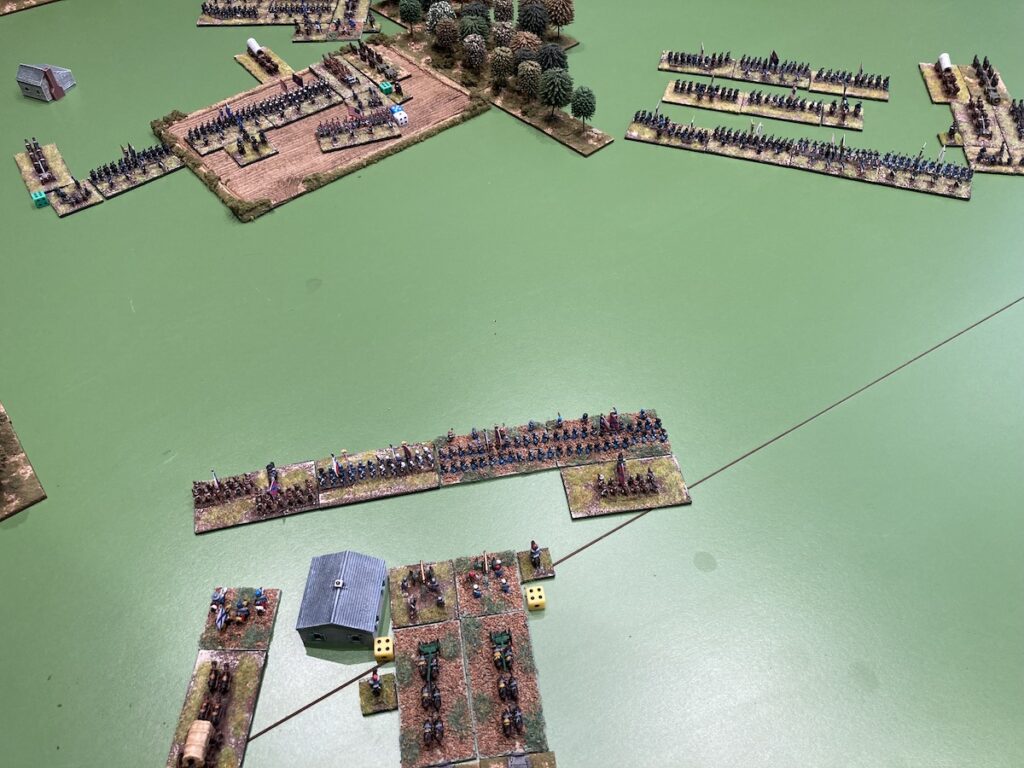
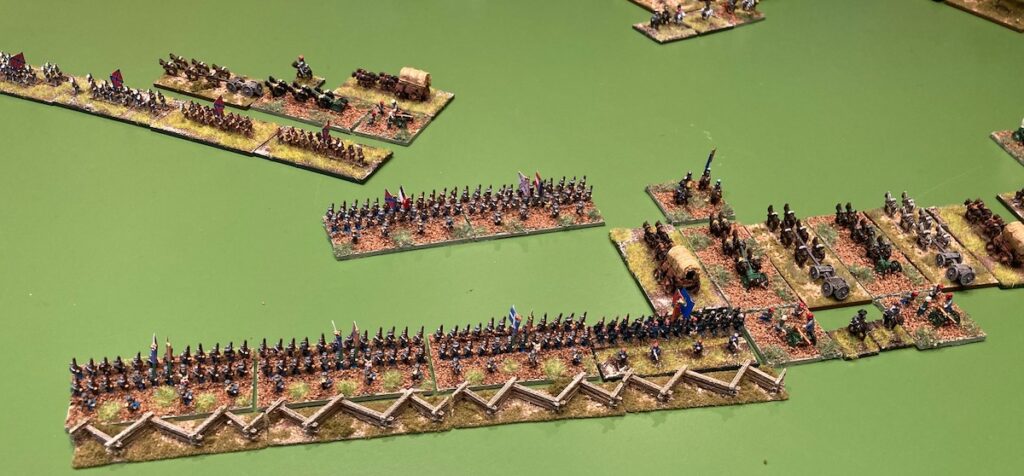
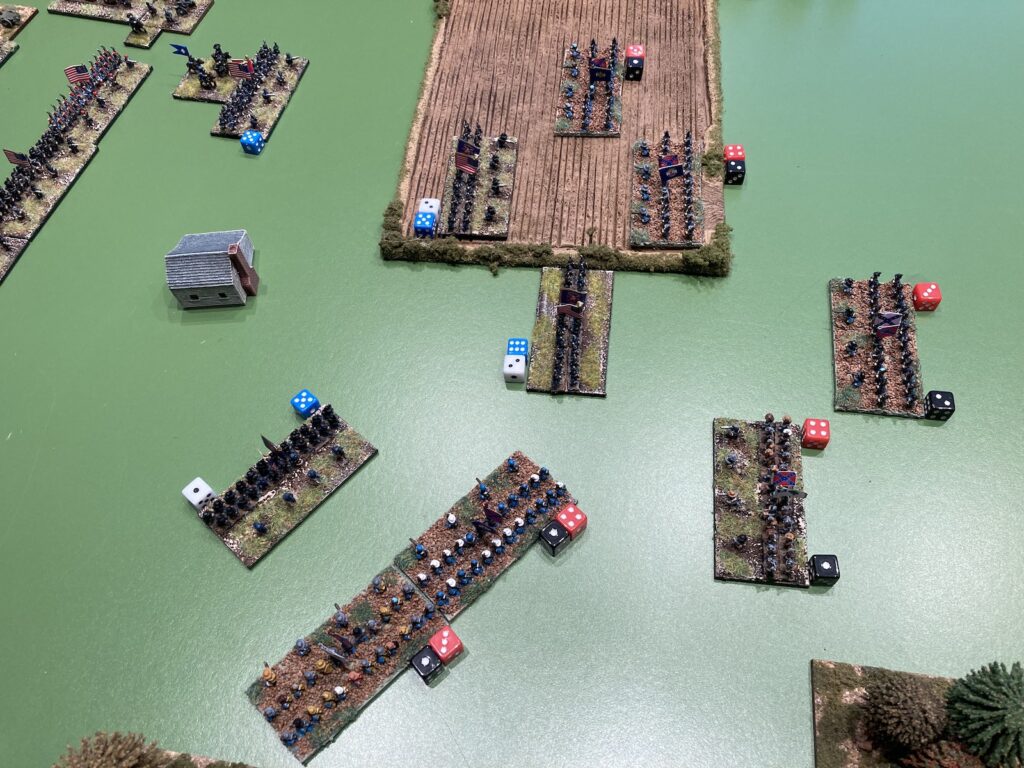
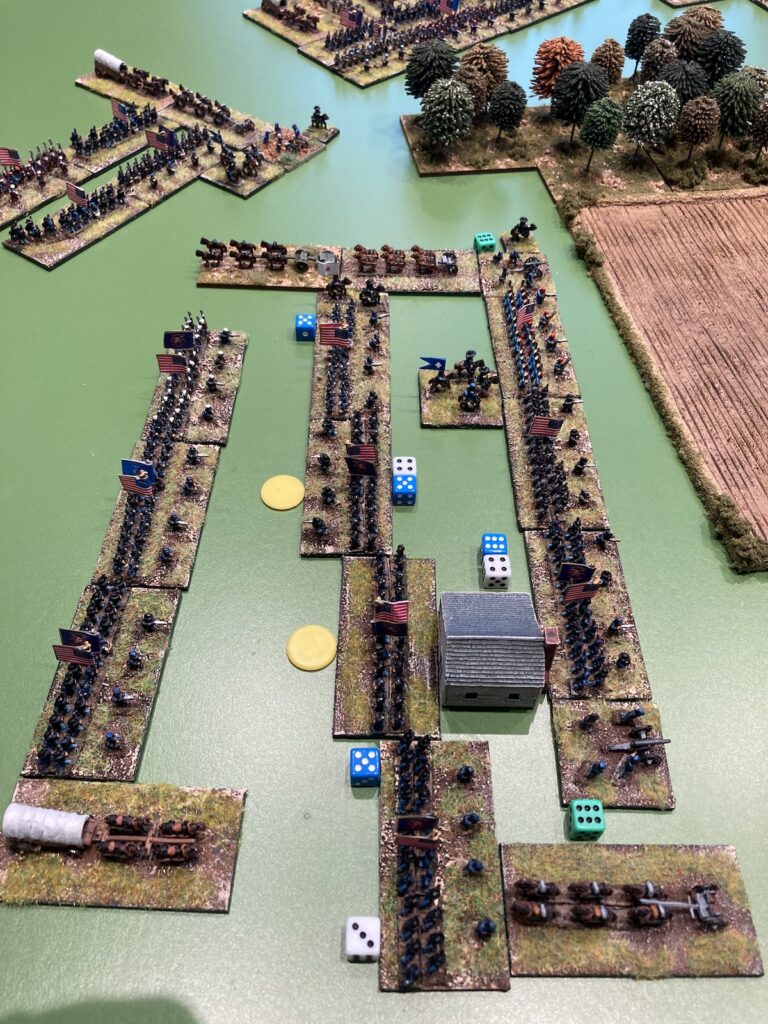
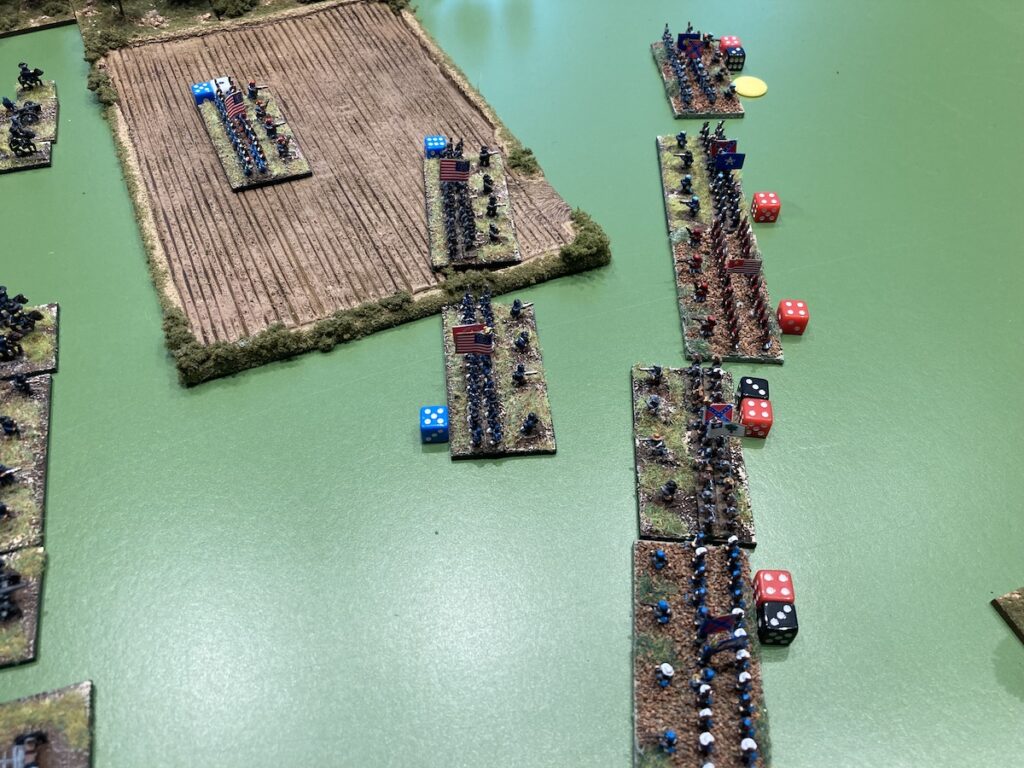
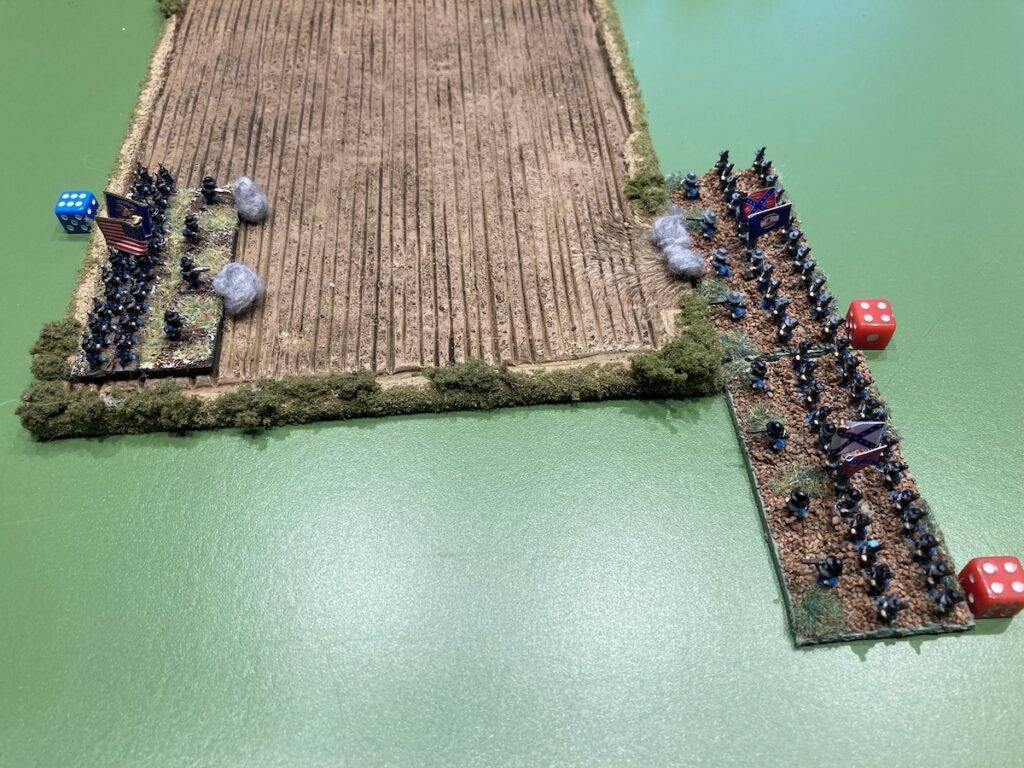
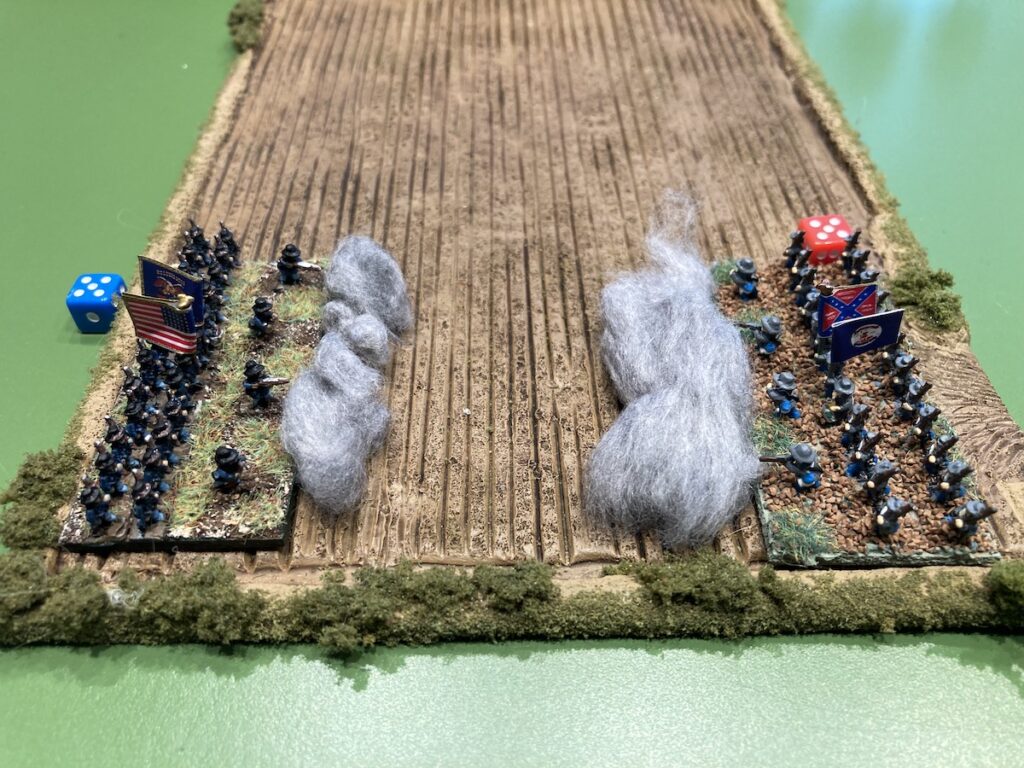
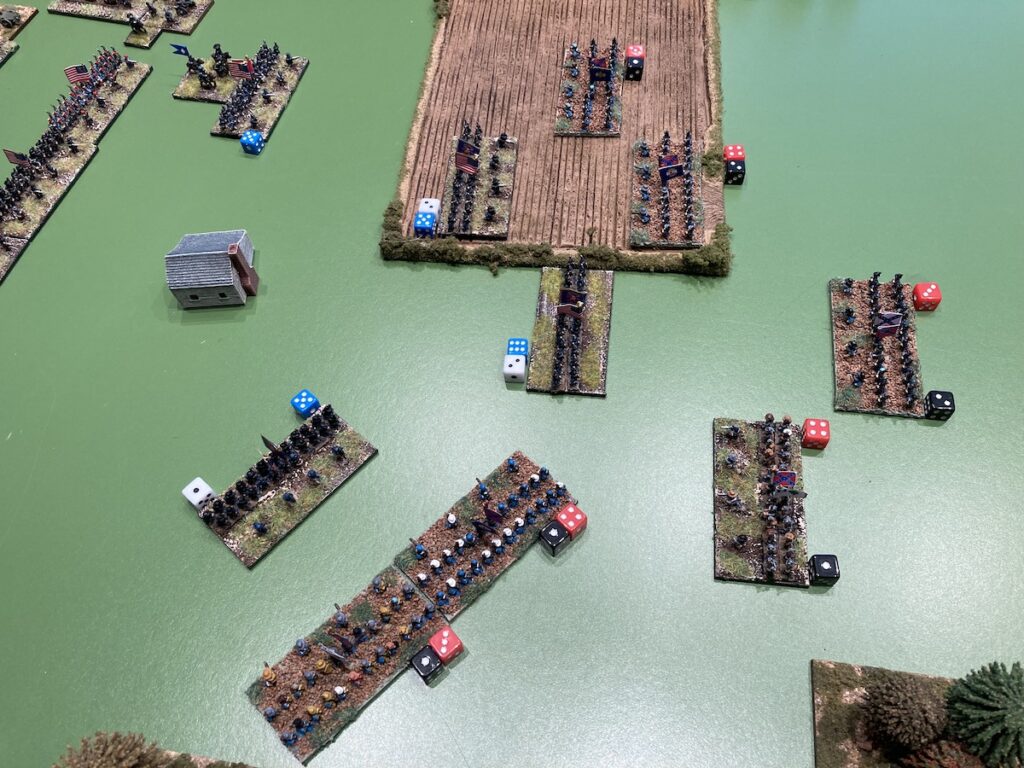
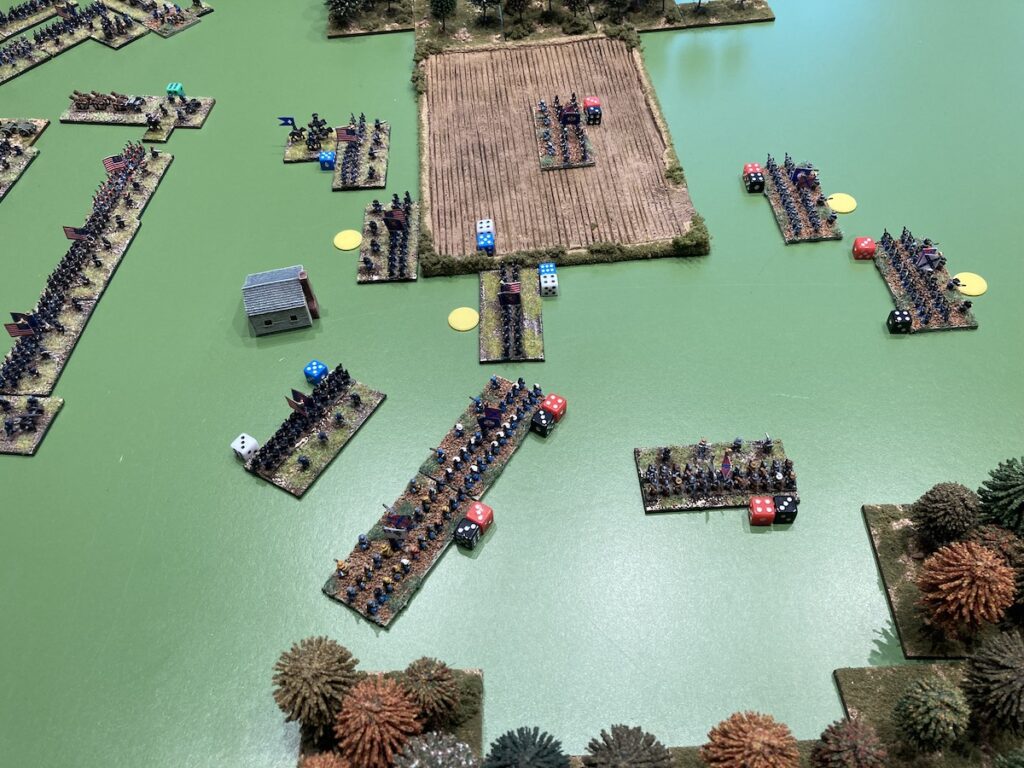
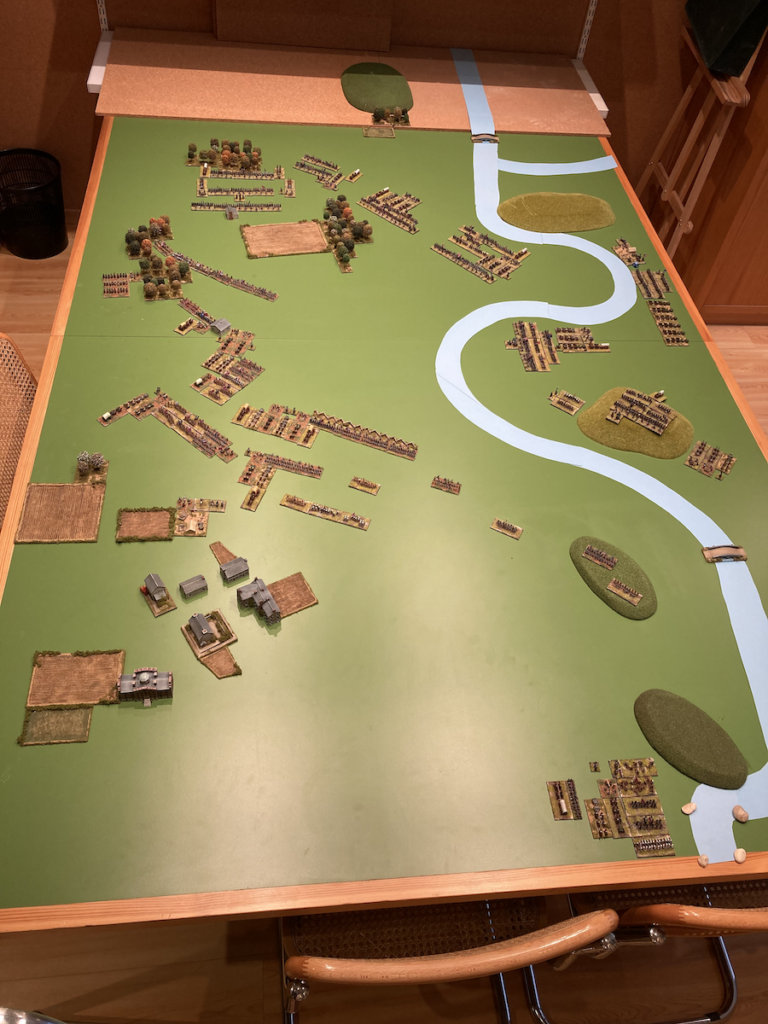
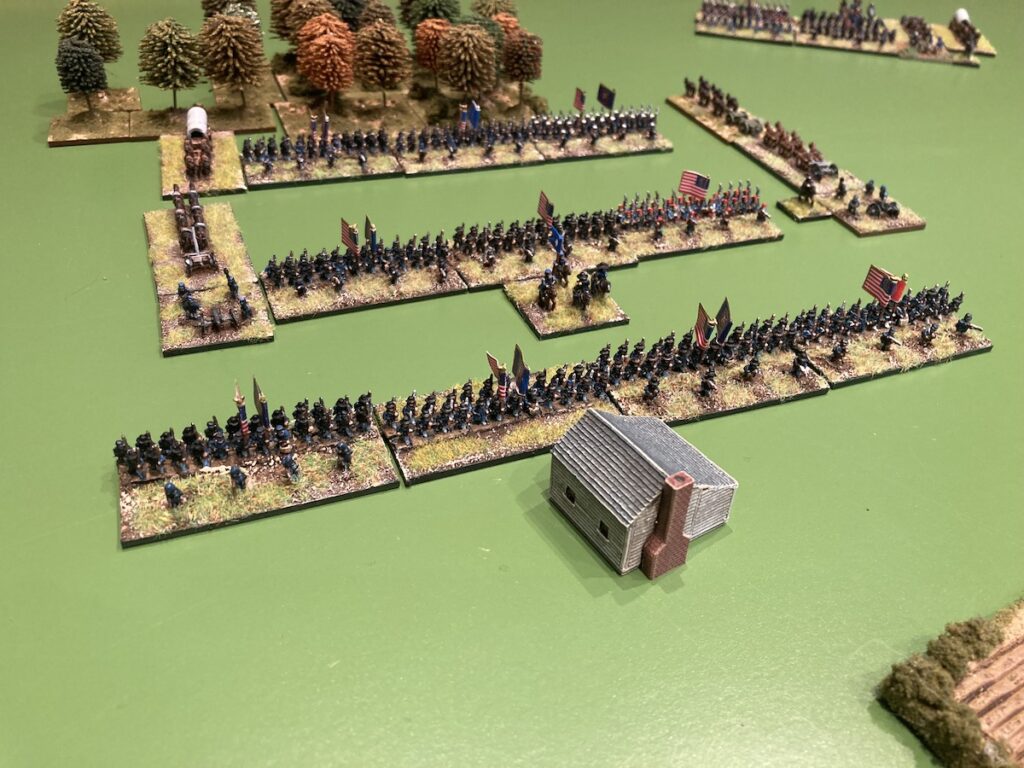
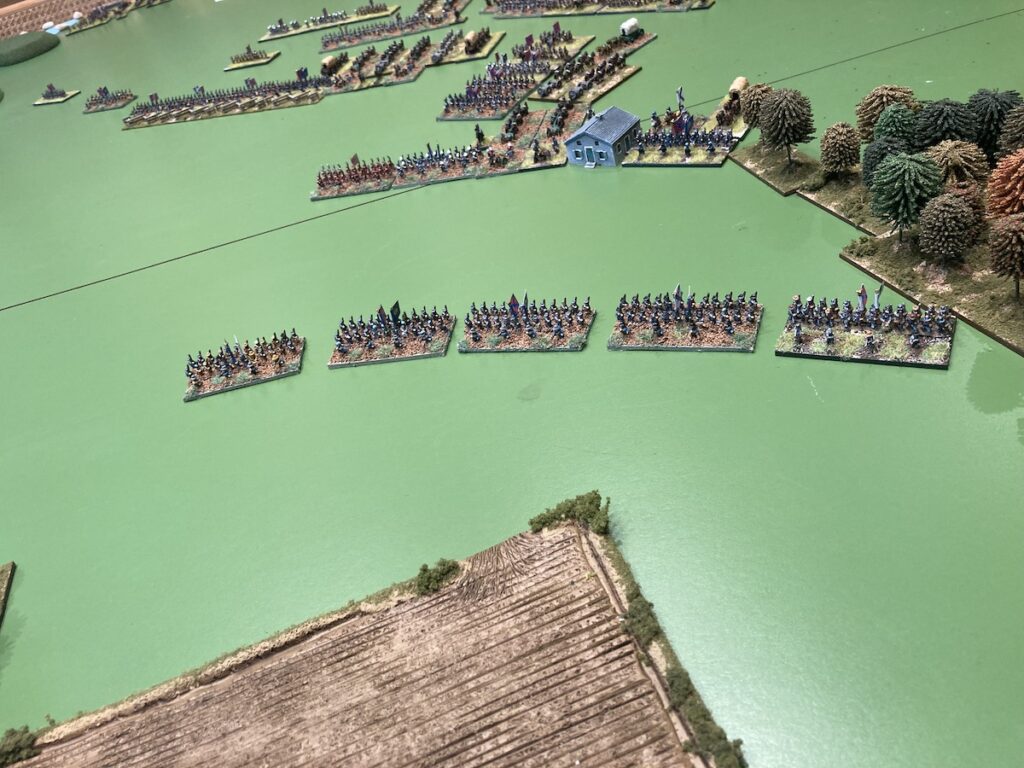
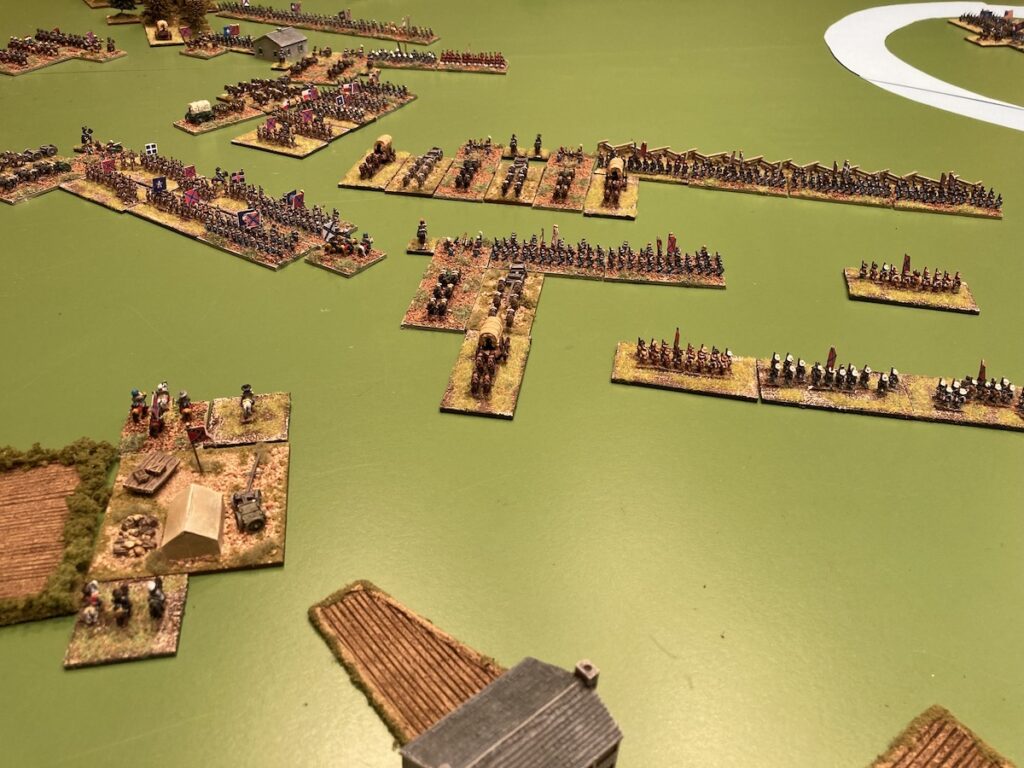
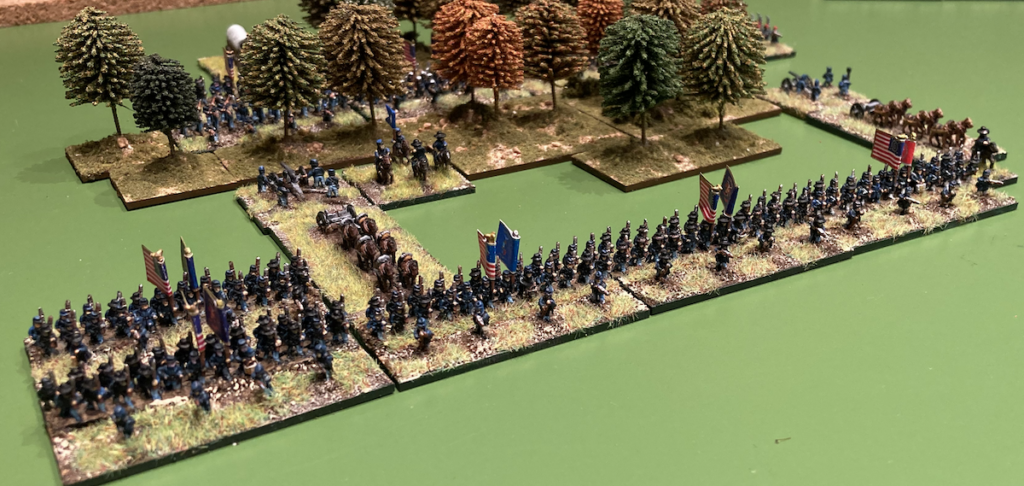
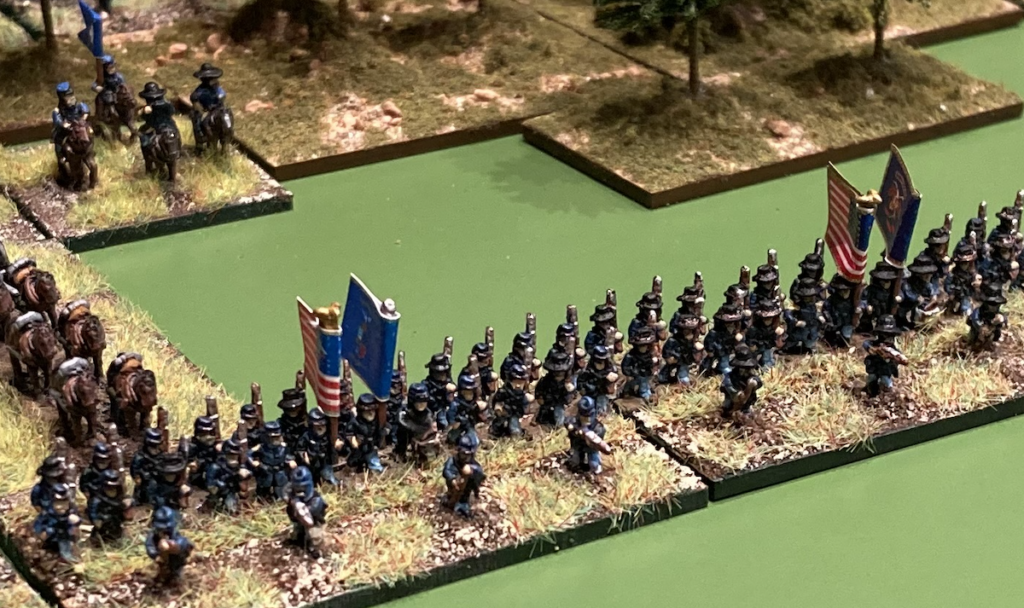
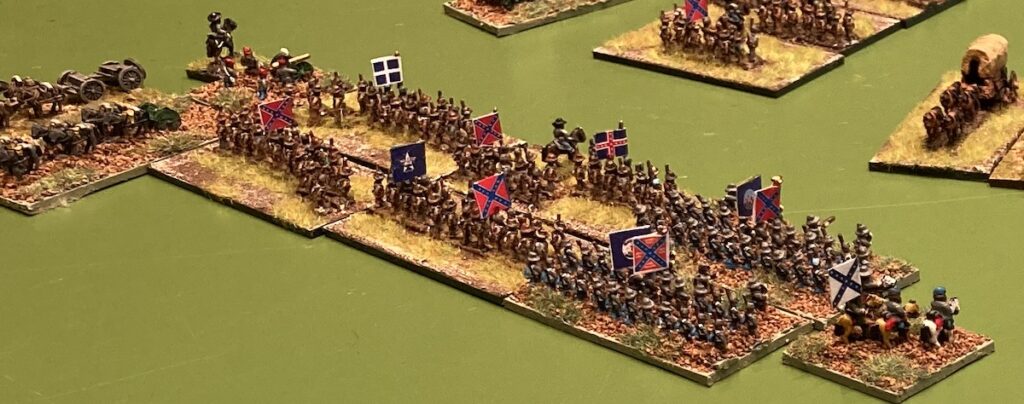
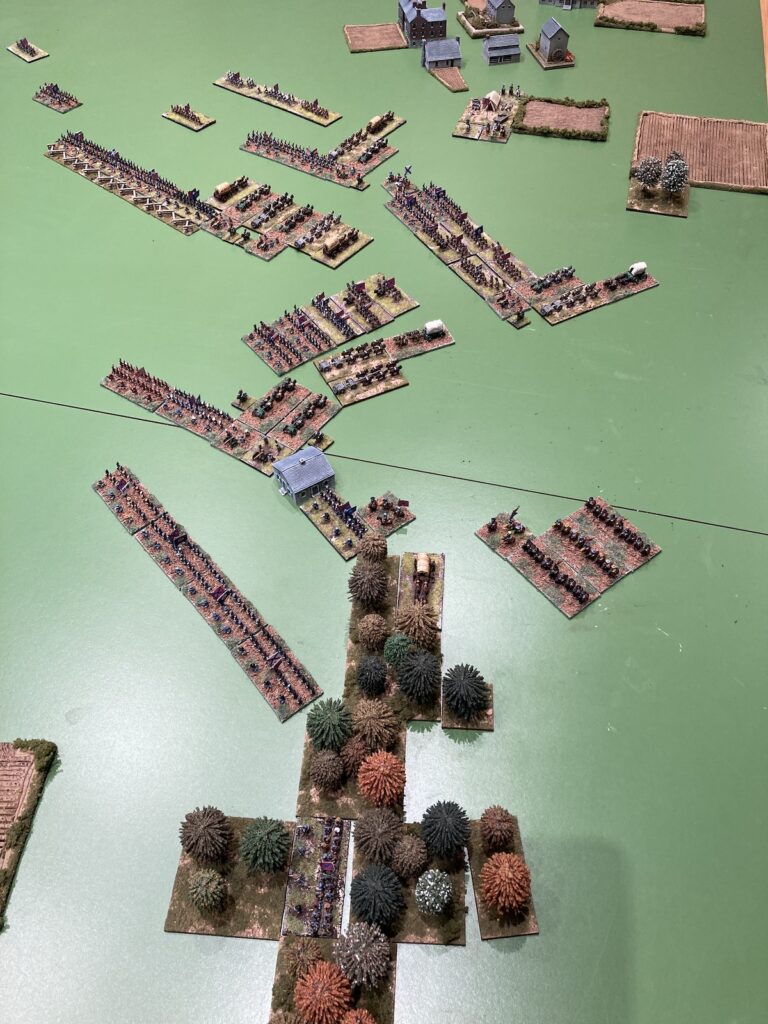
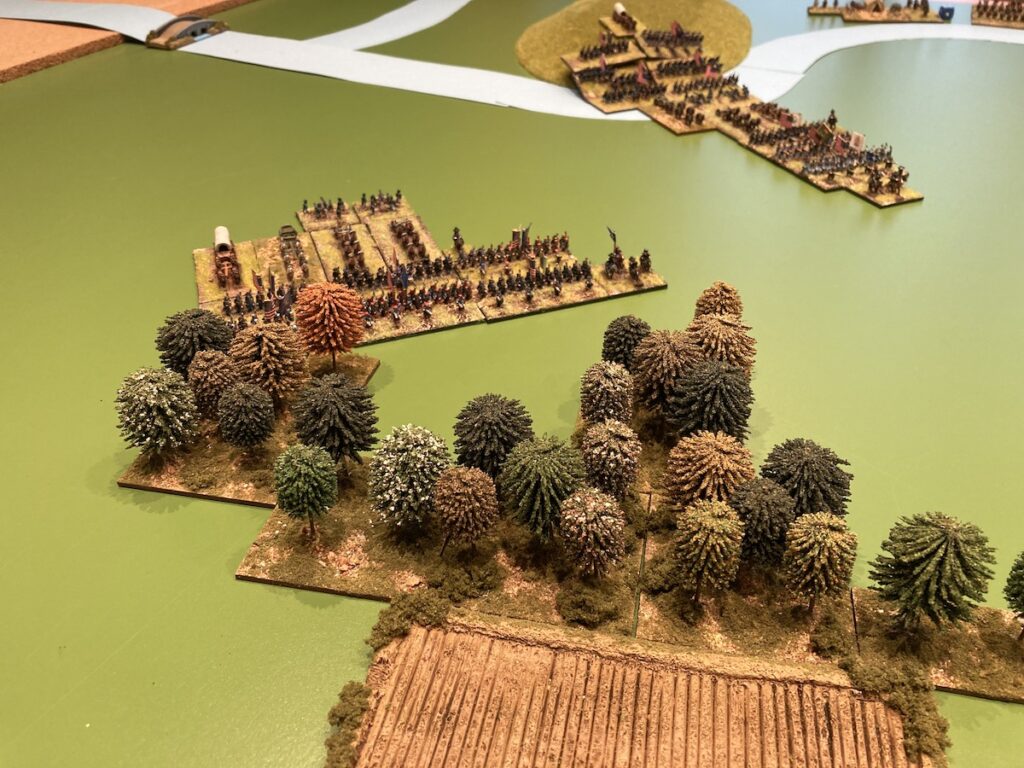
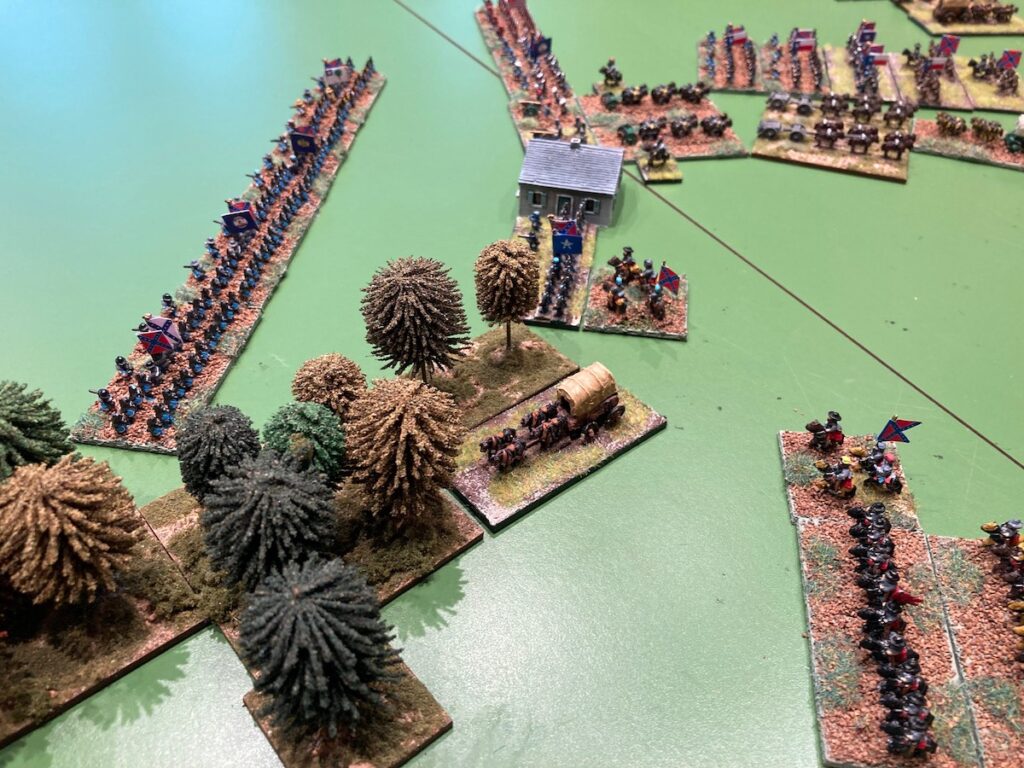
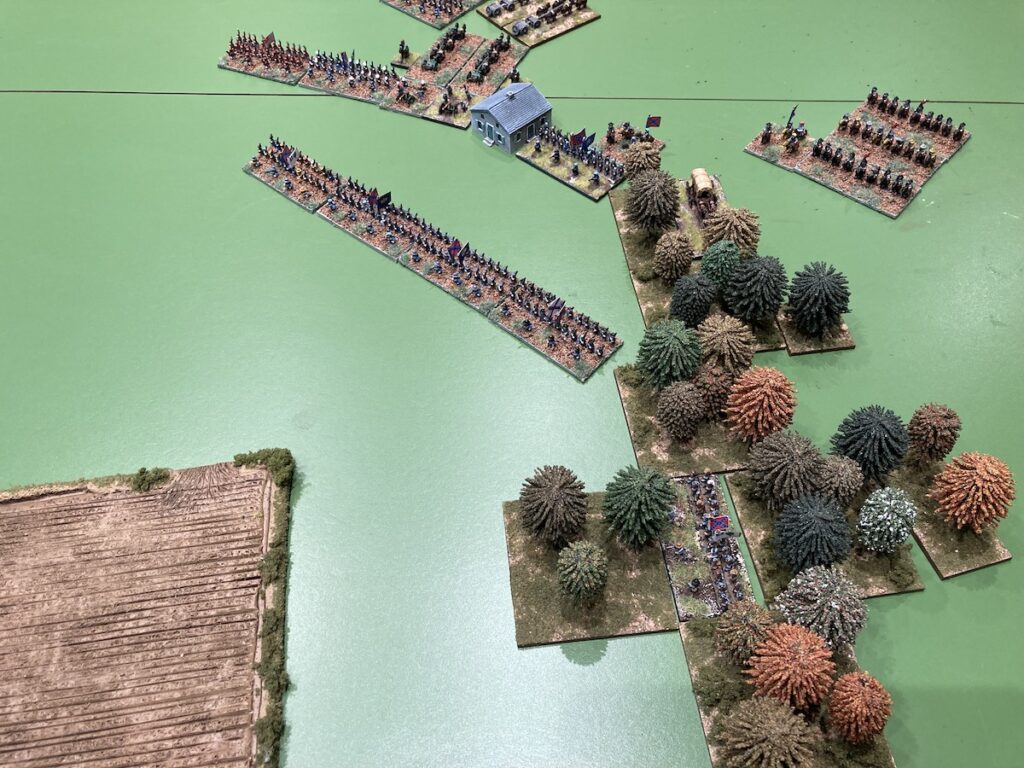
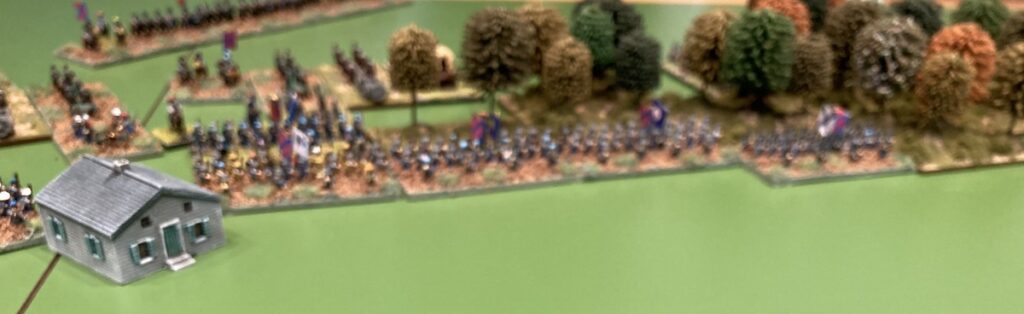
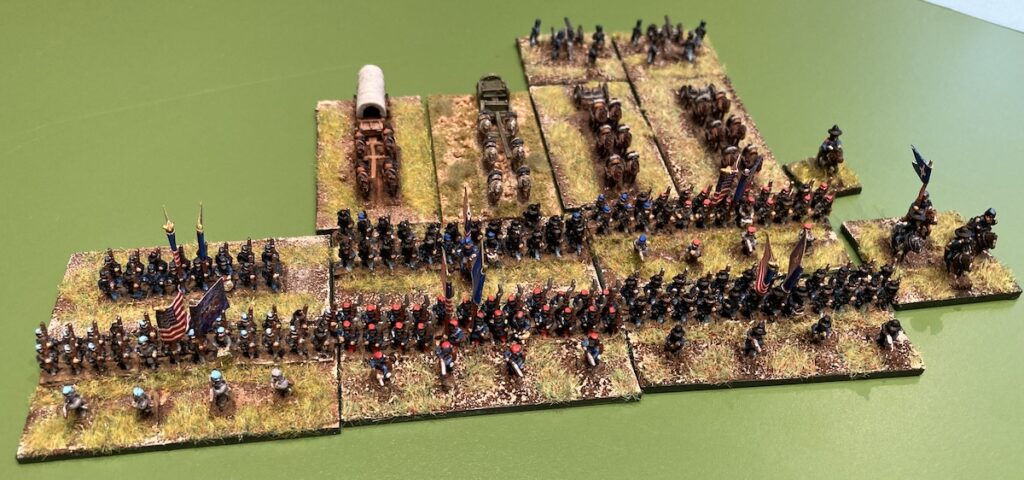
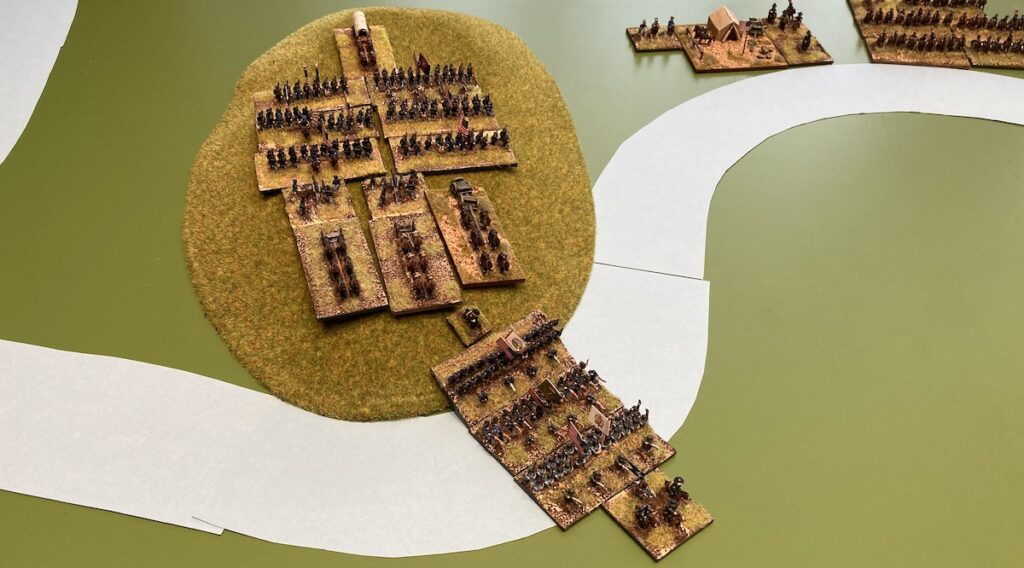
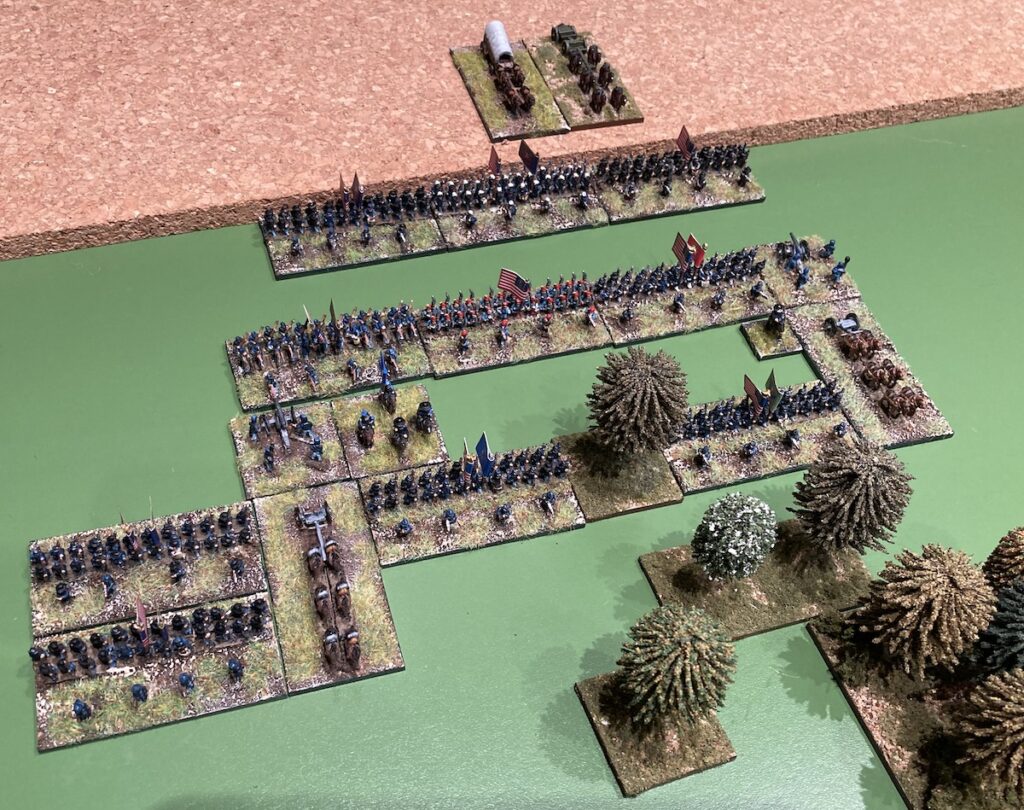
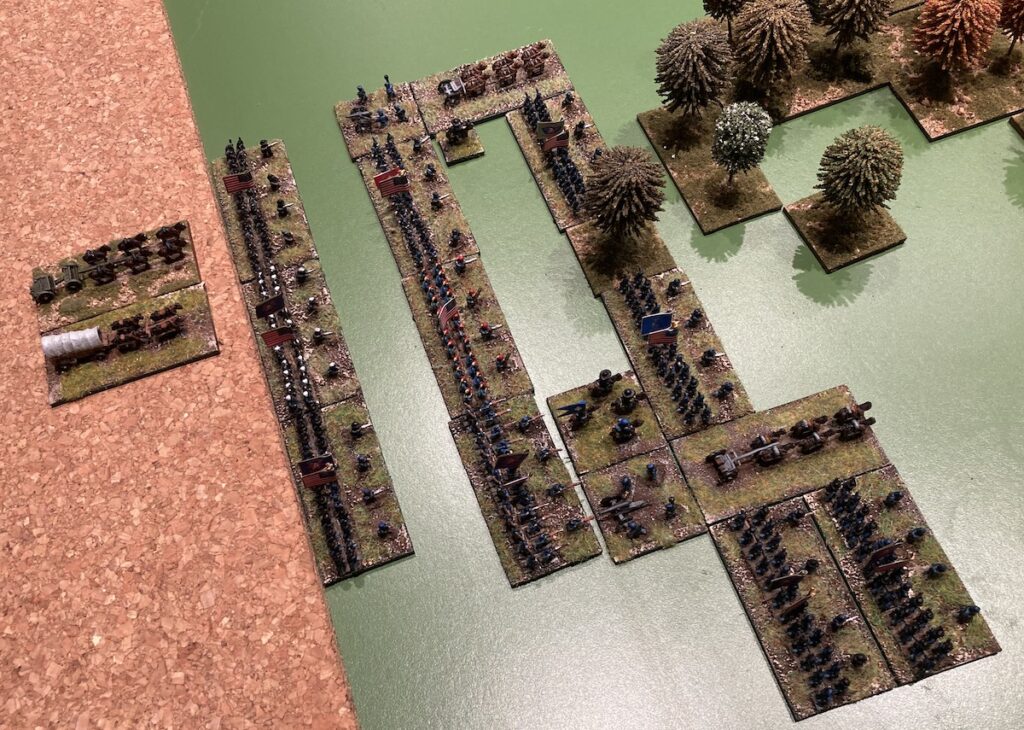
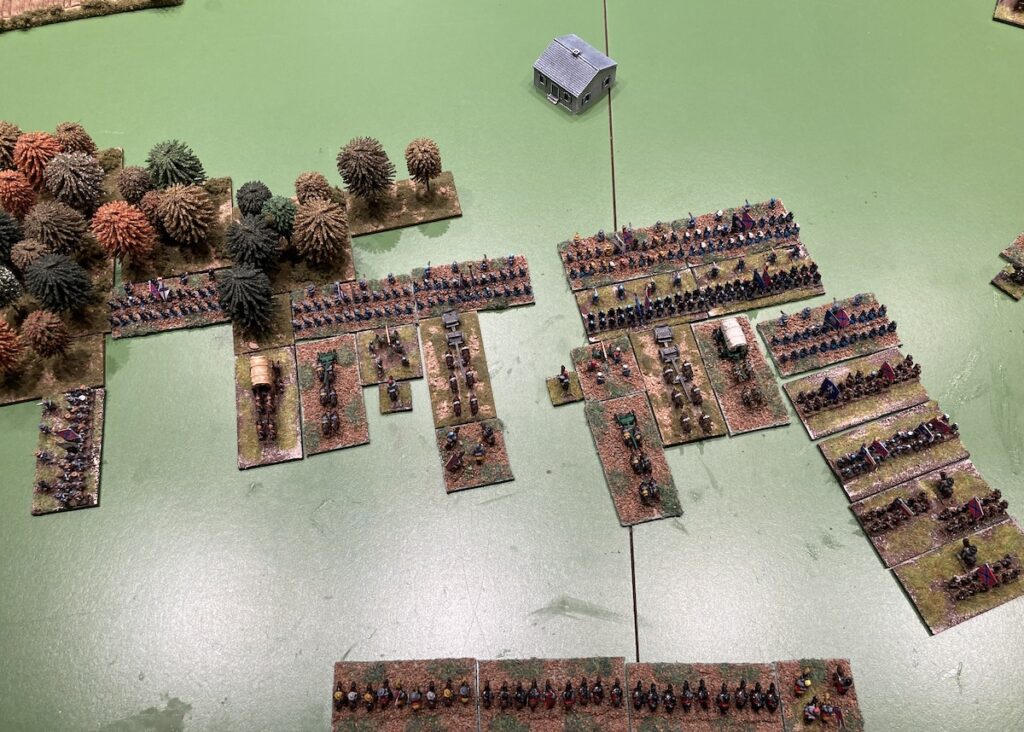
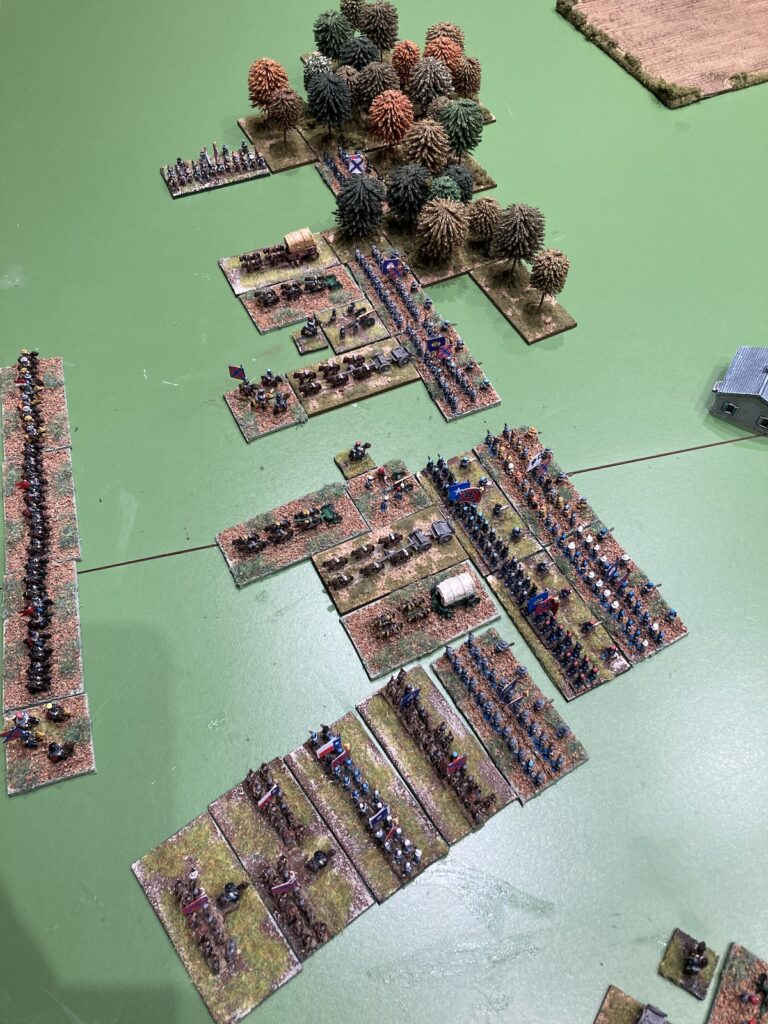
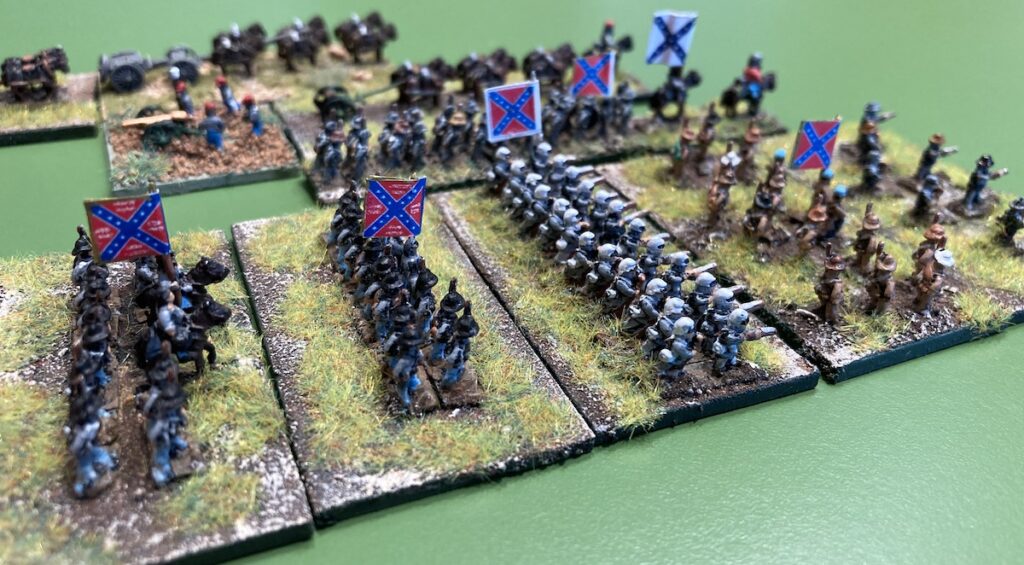
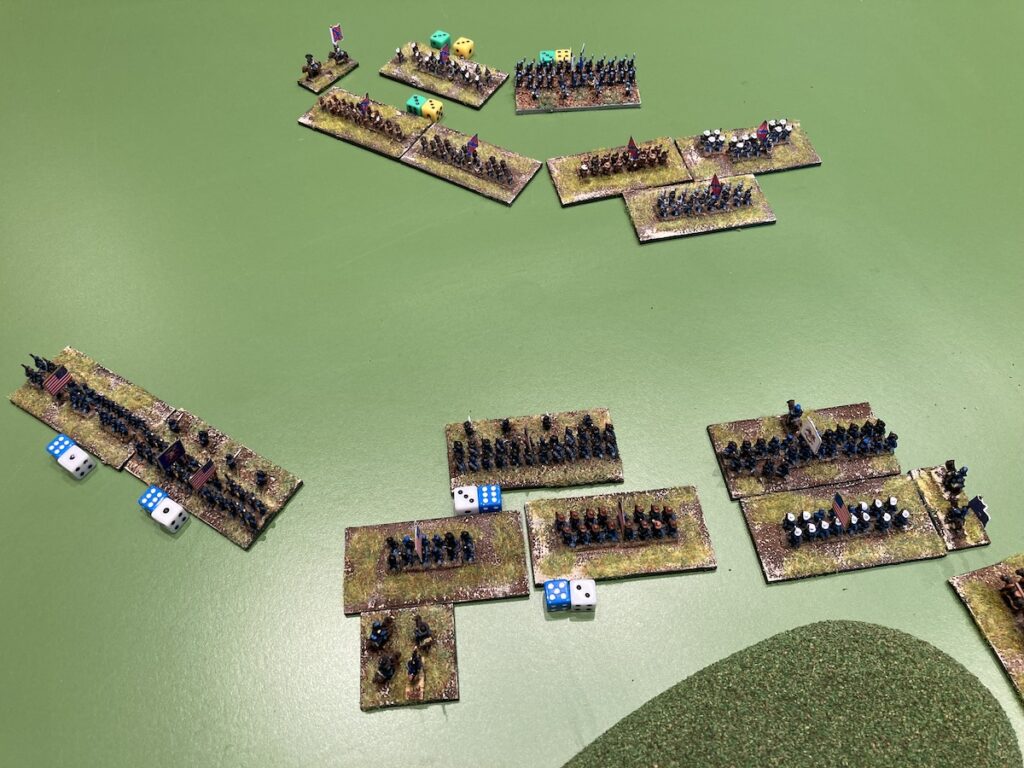
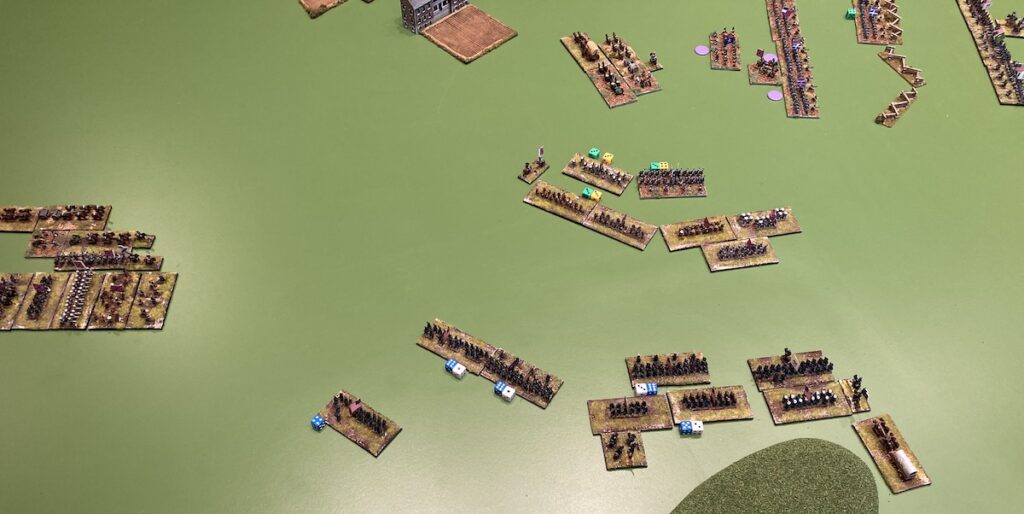
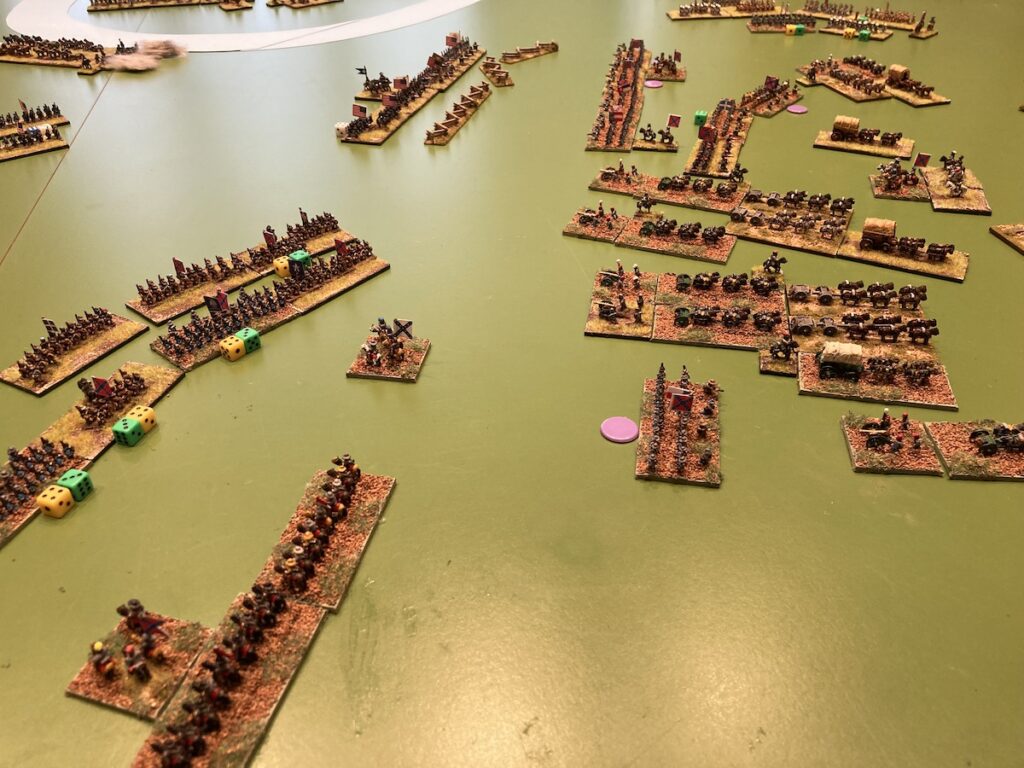
Some of you have been patient enough to follow this reenactment/wargame until the end. I will add some pics (final… you must be tired!) and then will give you my “conclusions”.

A.P.Hill’s Division arrives after a forced march from Harpers Ferry… to save the collapse of the Confederates right flank. Yes he is wearing his red shirt there in the background.
Confederates are retreating everywhere… finally Burnside is advancing with a meaning…
General view of the situation when A.P.Hill arrives…
Confederates retreating into Sharpsburg facing off!

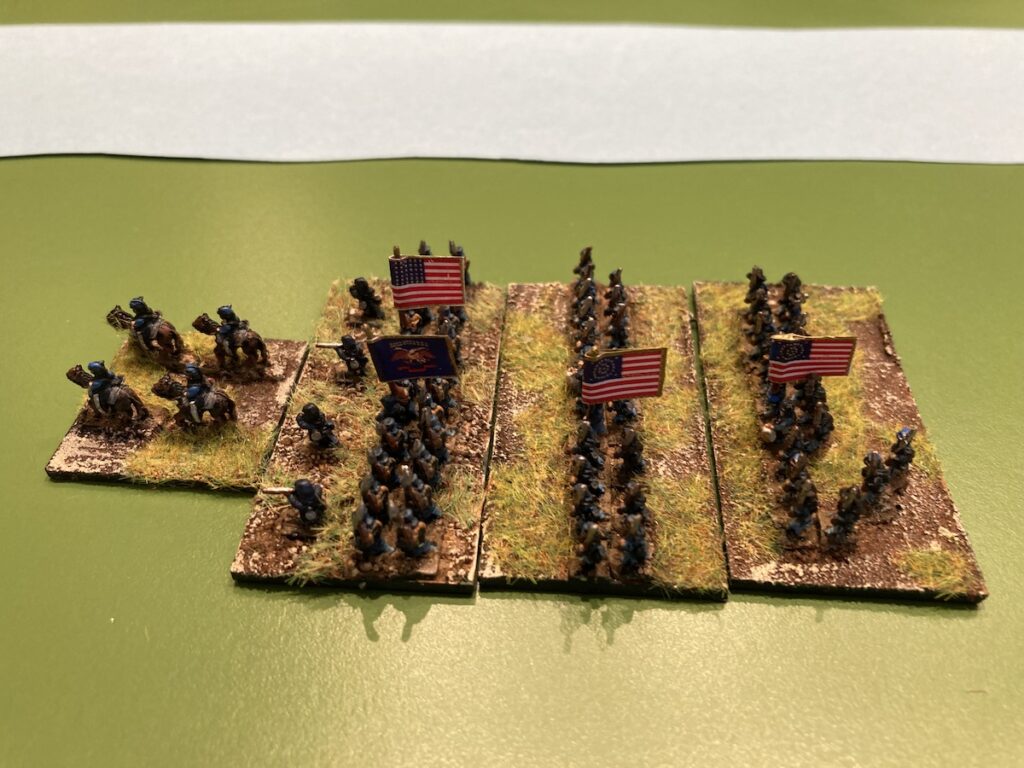
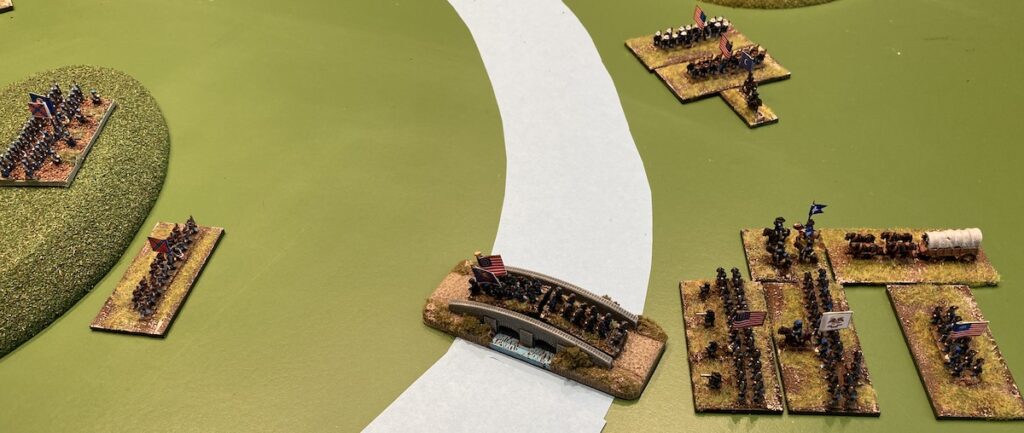
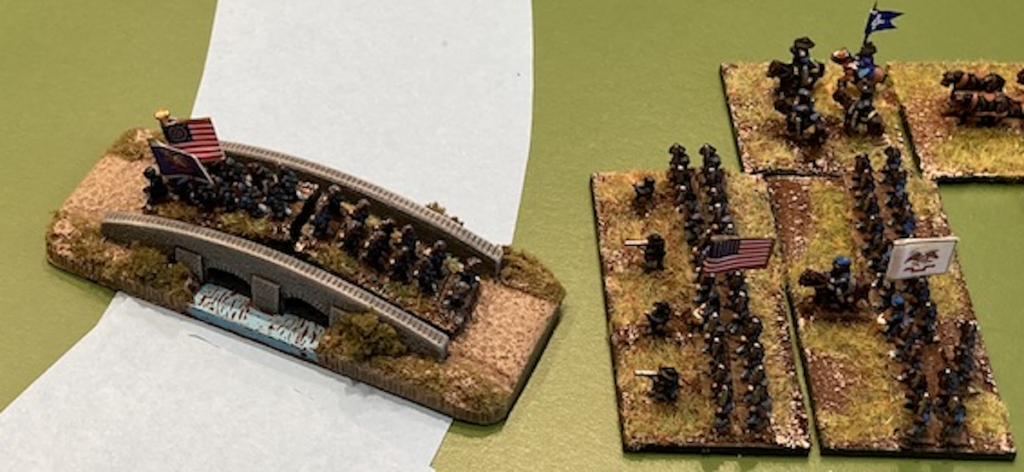
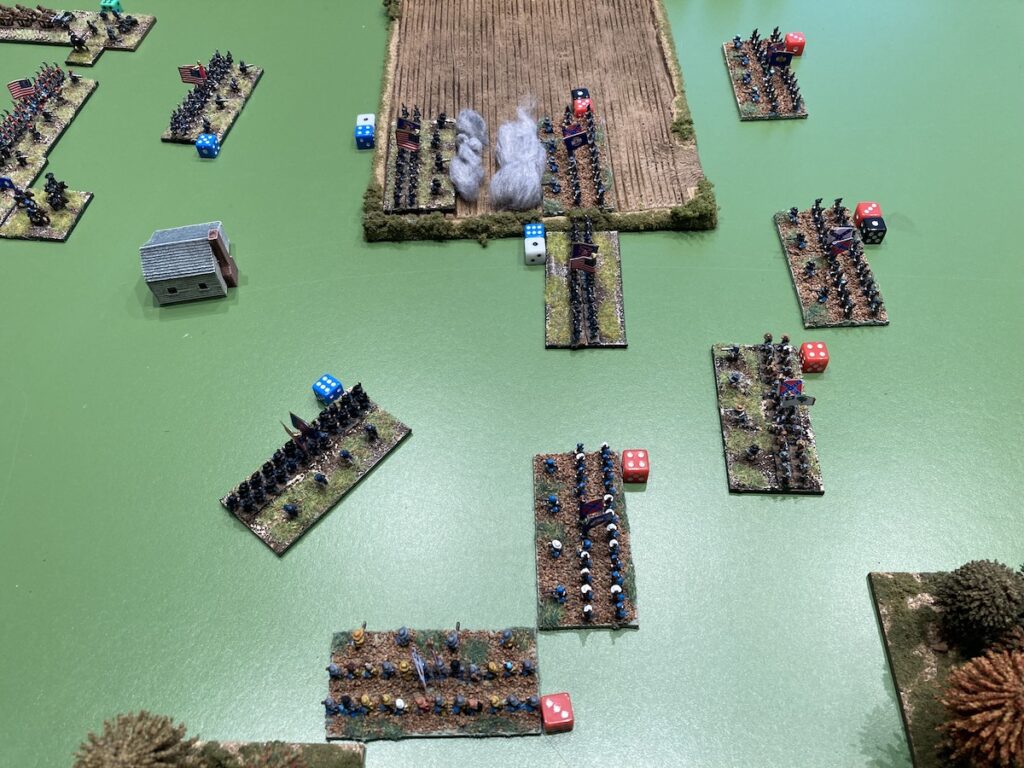
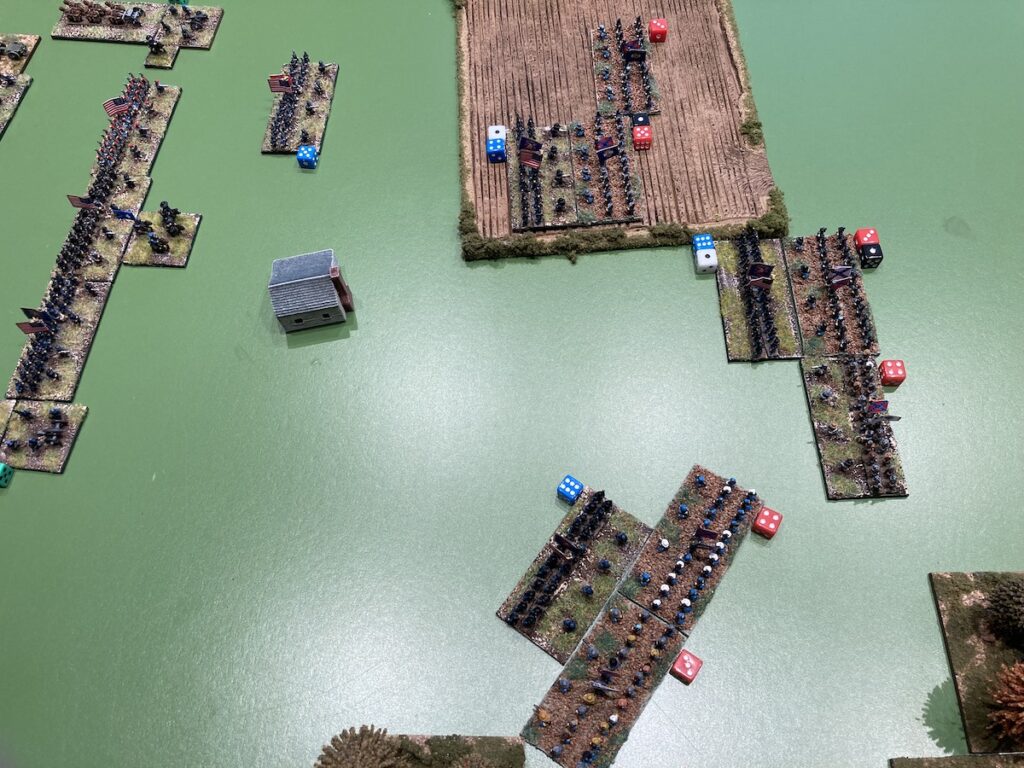
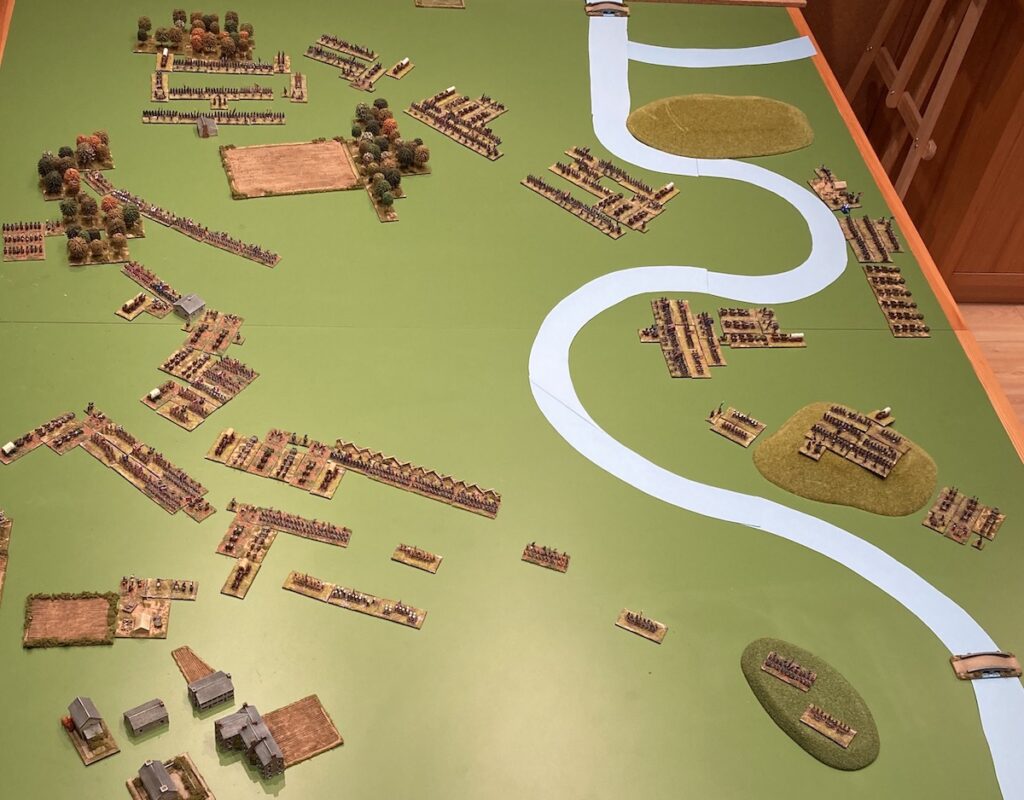
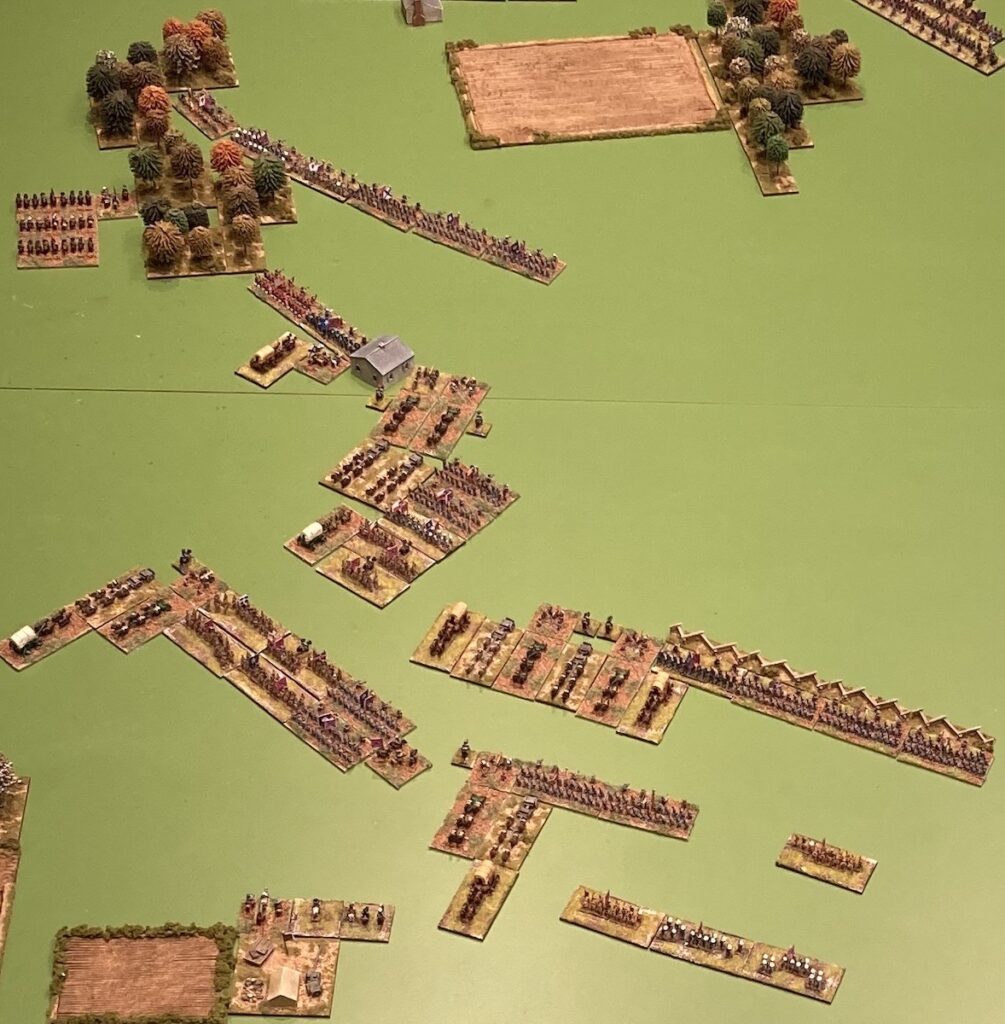
I was surprised that with minor variations the action or battle went so smoothly well (and not The Bolshoi Ballet syndrome at all). It was my first try of home rules ACW which I will not bother to explain in detail (and if I ever do… they will be downloadable for free as my book). The fact of introducing limits at what Brigade and Divisions could do before getting tired/spent/out of ammo and for how long was a success, the idea of throwing a dice per brigade stand to see if they engaged the enemy when close to it (there when the thing matters) was also a box of surprises but went quite well too. Minor things were the survival of Mansfield, the performance of the Irish Brigade (Union), the fast crossing of Burnside’s bridge… but overall quite “historical”.

I have had doubts before it, but now they are clear to me… I have more fun with the real characters of the ACW than with imaginary generals. For a solo wargame it went well and to my taste (HOW NOT?).

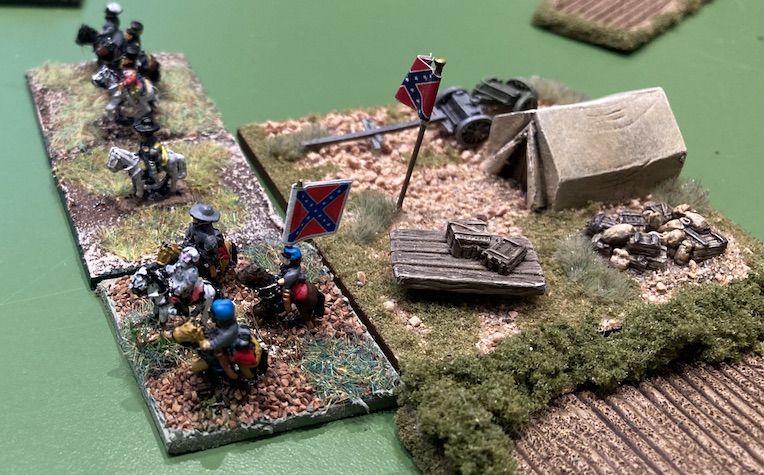
That one can have pleasure reenacting America’s bloodiest day is only a matter of perspective… no one died… my toy soldiers will live to fight another day… Brandy Station, Gettysburg and Trevilian Station are projects on the near future. Cavalry did nothing but to find a ford in the present one… and Stuart was an spectator. And after all I have all those Cavalry Brigade stands…

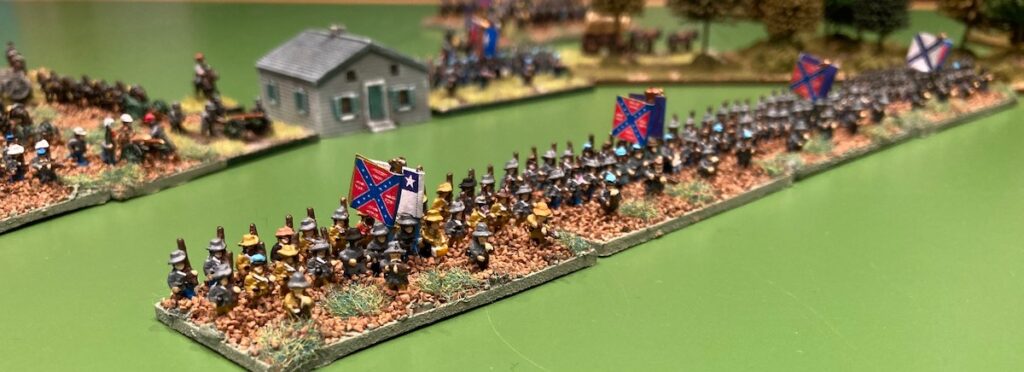
The ACW is for me the last of the “old wars” and even “romantic” to a point… morals were different back then… some protagonists were deeply religious… and some had been too much exposed to Walter Scott’s novels. I try to keep it that way a serious affair but with a bit of taste thrown in.

Enjoy!

ANTIETAM/SHARPSBURG 1862 in 6MM (X)

Visits: 44

Yesterday was the climax of the battle… Mansfield stabilized the right flank (Union)… Sumner was involved in a great firefight against the Confederates in the sunken road… Burnside did cross the bridge and went to the other side…

I expect to continue for a few more moves and see if DH HIll Division comes from Harper’s Ferry on time as in the real battle. I tend to allow that possibilitiy a high average of success because it did happen.

For those interested in the real thing instead of my ramblings read A LANDSCAPE TURNED RED by Sears… or even the Osprey would do.

For me it was like seeing a movie and understanding a lot of things… I would probably bore you till the end of it…

Enjoy (if you do).

Climax!
The sunken road fight!
Things are really hot but would petter out. Both sides been tired.
Burnside attacking on the left flank (Union)

ANTIETAM/SHARPSBURG 1862 in 6mm (IX)

Visits: 39

Today was a fantastic series of historical moves and actions!

Not only Hooker was wounded (and replaced by Meade as in real life!), Burnside troops crossed the bridge of his name in their first try!… part of the troops were heading for the ford anyway… Sumner is going to pitch against the sunken road… the last division of Hooker’s Corps is entangled with Hood’s Texans…

I am enjoying myself immensely… and glad to say so… it was worthwhile collecting allthose minis and stands.

Enjoy!

Hood’s Texans engaged with Hooker’s.
Part of Burnside’s troops goes to a ford found by a cavalry scouting patrol.
The bridge assault!
Zoom
Sumner’s second corps advances against the sunken road
The struggle goes on!
Aerial view!

ANTIETAM/SHARPSBURG 1862 in 6mm (VIII)

Visits: 54

Well, an update was needed… Hooker’s first and second Divisions are tired/spent and Mansfield is coming up. Six Union Brigades depleted are going to the rear area and would not intervene in te battle again.

Same on the other side, Jackson’s Eight Brigades are gone to the rear spent/tired/out of ammo (whatever in my rules)… and concentrate around Sharpsburg… Funnily enough (say dice are wise) The Louisiana Tigers did put a fierce show until forced to retire.

We are in for Sumner’s attack and Burnside’s crossing the bridge of his name…

I may be accused of making the rules as things develop which is not true… by luck they do function but will adjust once this particular reenactment is finished.

Enjoy! (If you are interested in this series)

General view.

Burnside’s on the move… to the bridge…

Sumner’s advance (II Corps)

Confederates and Union troops from the first clash on the Right Flank retire spent/tired and are replaced by other units.

Hood’s Texans advance

Confederates behind rail fence at the Sunken Road.

ANTIETAM/SHARPSBURG 1862 in 6mm (VII)

Visits: 43

There are seven Posts so far… but that does not mean it equals seven turns or seven hours… so do not extrapolate please… it is a slow and quite parsimonious tale.

After chaotic fighting for the cornfield Hooker’s First Division retires and he throws in his other two divisions supported by Artillery. The Confederates also replaced their tired troops by fresh one’s and the fighting continues.

Sumner is advancing as planned and so is Mansfield!

The morning goes on… but the day is young yet… Burnside continues doing nothing… (except sending cavalry patrols to find a ford) McClellan is worried by his imaginary inferiority in numbers (THAT is very difficult to translate to the tabletop… but I guess having Franklin and Porter in RESERVE account for that!).

I can only play about an hour or so a day (and not everyday because real life intrudes a lot… but it is fantastic to have a permanent table in a safe place!… you know what I mean…no one is messing with the tabletop at all… but me)

So far so good. satisfied… still working on mechanisms but the battle flows quite right!

Enjoy!

Follow up…
The Rebs have the cornfield (again)
Union passage of lines (retreating through fresh advancing Divisions…
Louisiana Tigers advancing…
Union fresh Brigades attack!
The clash!
Not through yet!… more to come…

ANTIETAM/SHARPSBURG 1862 in 6mm (VI)

Visits: 63

As promised… a division of Hooker’s Corps goes forward, a Brigade simply refused to move so instead of 4 brigades only 3 make the attack… Confederates have their problems too. All that because one thing is “to move around in the countryside” and other to move against an enemy. (Dice involved simulated field of vision and local orography… but also excuses -read officer’s characteristics-to do not move…).

So I used red and blue dices to show the relative strength in numbers of Brigades. Those are added to a six sided dice result and there must be a real difference in pips to have a decisive result (one or two pips difference are ignored)… More in following attacks. Brigades have a tendency to stand or even recoil quite easily… more difficult to press attacks… There was even a case of enfilade fire that did not succeed!… I had fun (not guaranteed)!

As I have said before 4 turns is the maximum “time” (time is flexible again) a Brigade can stand on the frontline fighting… afterwards must retire tired even if victorious… some exceptions will be worked on further on. This is shown with the use of white and black mini dice. So in fact I micromanage the fights that seems “hours” to participants… while the rest of the Corps (both sides) await results.

Quite if not completely satisfied with the first experimental solo rules… ties where resolved with the turn of a card for each side… if that also (it did not happen) was a tie I have gone to the deck of ultra rare or unpredictable tides of war situations that happened in real life.

My kind of “game” is quite impartial and develops like a film or scene… I am an spectator of it… but I expect Armies to behave like the Historical one’s. So far so good.

More next days.

Enjoy!

Some Brigades get lost or simply not move. Uncoordinated movements.
Long distance firefight. Skirmish.
Firing inside the Cornfield.
General view of First Division (Union) attack.
Sort of Climax.
Still polishing rules but satisfied.
End of first fight! (for the moment) Yellow markers means it is the end of the fight for those Brigades.

ANTIETAM/SHARPSBURG in 6mm (V)

Visits: 61

Guess this afternoon I will proceed to reenact the first clash between Hooker and Jackson… it is slow sometimes I agree… but I am still experimenting with command&control and combat mechanisms. It must be tiresome to follow… but at least you have plenty of pics (curiously enough my mobile phone does it better than my old camera)…

My table is flat (got criticized by that in facebook) which does not mean the real terrain was flat at all that is taken care of by visibility options but also the fact that once firing starts smoke and noise will prevent God’s Own View… I mean it is probably God’s Own Scale… but the troops engaged where “lost” in the chaos of the firefight.

One of my phobias concerning Toy Soldiers is stands “balancing” in imposible positions over railroad scenery modeling terrain… sorry chaps… but this is what it is… neither troops fighting on top of woods a la LITTLE WARS TV way (which has very good points and creativity -aka Trafalgar- but not that particular one!)

Hope you follow me.

Enjoy!

Aerial view.
Hooker’s attack
Lees’s left flank
Sumner’s advance
Lee’s HQ with foreign observers…
Bottom right Burnside’s bridge
Confederate Army of Northern Virginia… Sunken Road represented by a rail fence.

ANTIETAM/SHARPSBURG 1862 6mm SOLO WARGAME (IV)

Visits: 55

It says wargame in the title… but this is an exaggeration… call it Umpire’s delight (Impartial), Chaos&Casualties, History on the Tabletop, Epic Brawl, Attrition for hours!… a lot of names come to my mind with no real effort…

Funnily enough bickering/arguments between wargamers do not concern me at all… by example I started the battle setting the table and the troops (Armies in 6mm please) without a hitch, I even switch brigades from one Corps to another if wrongly deployed… anything goes… I am reading for the umpteenth time rulesets and books about the ACW and ANTIETAM/SHARPSBURG in particular… and so far have gotten to a lot of conclusions…

FIRST: NO need to write down all the possibilities of movement and distances the troops can manouever… if not in contact with the enemy it is pretty straightforward… and that’s that!… easy enough to my satisfaction (SOLO).

SECOND: I will pass of generals characteristics as in Altar of Freedom for example (a good set of rules for multiplayer games).

THIRD: ALL movements count as simultaneous as the fire from guns and muskets… I will do my own table about that…

FOUR: ONLY three status for Brigades, say FRESH/ORGANIZED (1); HAVE BEEN ENGAGED/TIRED/DISORGANIZED (2 ) (synonymus in my book); SPENT/RETREAT TO A SAFER PLACE/NO USEFUL AGAIN EXCEPT IF ATTACKED (3)… more about that third category later on but it means basically you can not use them anymore in that battle… NO running out of the table… just a safe distance. Brigades of (1) and (2) categories can recoil, retreat, and do “things” until they go (3)… meaning they can be rallied and pushed forward again… NO BRIGADE CAN STAND MORE THAN 4 CHAOS FIGHT (all fighting is chaotic…and there is or will be a lot of compulsory movements… that would be the more complicated thing to translate in writing I guess) NO plans resist contact with the enemy.

FIVE: There would not be Victory points neither a “clear result”… once the slaughter stops Armies will stop fighting and as in real life you (ME) will count casualties (more or less) and for once would like to see a result similar to the one in real life… Armies would have done what they intended to do but once a third of the brigades of either Army (or both) are in the (3rd) status call it SPENT… Battle stops… and I do not give a damn which Army retreats first for ressuplying/reorganizing etc. CONSIDERE THAT SIMULTANEOUS after truce to get the wounded etc.

Quite strange?… simply my way of seeing things… I do not particularly relish in ACW medical services (William Holden or not), amputations, and the rest… a hellish place to see a battlefield after an engagement… let’s consider my way an eagle eye (or fly on the wall) approach to those epic brawls.

Chaotic Fight will please you or not but I intend to explain in detail (more or less), the same way Division Generals are not considered in detail in some rules I use them when Corps Commanders are Killed or Wounded… have to write my blank cards using BELLO LUDI as a model to resolve ties… “Colonel gets the jivers and runs to the rear as in real life happened”, “Out of Ammunition”, “Sudden Panic”… the lot what!

Hope you enjoy a bit!

Seen from Sharpsburg…
Hooker’s Corps is out of the North Woods…
First Zoom
Second Zoom.
Confederates
Aerial view of the REBEL Army!
Other Union Corps approaching!
Detail
Frontal view of the Confederate deployment in front of Dunker Church
More aerial view.

ANTIETAM/SHARPSBURG 1862 (III) 6mm (My Way)

Visits: 42

Remember I am still experimenting devices and mechanisms (NO AI thanks GOD!). It is interesting (maybe) the things I have cumulated over the years thinking they would be useful for a wargame. Some had not even 6mm in mind at the time!

I still have no definite (read exact or concrete) idea on how to use the playing cards… but usually “chance” and “resolve ties” are already on my mind! And NO I do not know if they are still produced Google on FOURNIER PLAYING CARDS and investigate yourselves (Any set of cards would do really… but it satisfies my aesthetics senses). Dice you know are basic in any wargame…

I first calculated the average men per Brigade at Antietam using OSPREYS, ALTAR OF FREEDOM and SEARS books… Confederate Brigades are smaller but the stands are of equal measure as Union one’s (bigger Brigades, smaller divisions, smaller Corps)… so the value proportion is around 6/4 (or evidently enough 3/2).

I still doubt if I will generalize to ALL Brigades or give some a + and others a – … keeping the whole balance jus to add variety… still working on that! (looks like Altar of Freedom but it is not).

Been a solo player I decided a lot of automatisms would help the flow of the game… no fancy micromanagement of brigades… they search and fight each other matter of fact!… More on that in the future. Attrition and Struggle foremost in my mind… also the notion (IMPORTANT) that Tired and Spent Brigades are very important concepts!

I do not like record keeping, I do not like dice on the table, (I will throw dice and turn cards on another auxiliary table)… but experiments are getting closer… will probably use too my own version of the BELLO LUDI Cards…

Well, enough for today…

Enjoy the pics!

ACW Poker Cards by Fournier
Union
Confederacy
Tons of dice! Different sizes (and got more average dice out of the pic)
Hooker’s Corps about to get out from the North Woods.
Union with markers (blue dice)
Confederates between West Woods and Dunker Church… going to wheel I guess…
Frontal view of the “REBS” (Jackson’s Corps)
Other Corps’s in movement… (UNION)
Crossing Antietam Creek (SUMNER Corps).

ANTIETAM/SHARPSBURG (II) (First move…) I am experimenting with my home rules.

Visits: 42

A word of advice… I am doing my own thing so do not expect to enjoy this (the pics maybe)…

A bit of an explanation (not excuses)… I have a lot of ACW Rules, even 6mm specific one’s but SOLO wargaming is not on the designer’s minds at all… I understand and not complaining at all… I can not BID against myself (see POLEMOS) the best presented are ALTAR OF FREEDOM (one cheer for the USA chaps of Little Wars) but I have to make adjustments to play them solo…

NOT that I will use them as my basis at all, but I mostly agree with several concepts… let’s mention an example… BRIGADES of UNION and CONFEDERACY had NOT the same number of men at all… one bigger one medium one small whatever… if McClelland had 82000 men present at ANTIETAM and Lee (around 44000) and the number of brigades is lets say 45/37 something has to be done to “adjust” the numbers. The numbers in each brigade of the Confederacy has to be “reduced” to get the desired balance of forces (I will try to do this with small coloured dices in the rear of each Brigade). YOU have been advised! I am still experimenting.

To avoid an absolute GOD attitude in which I will represent each Commander in Chief (both sides), each Corps Commander, and even Divisions and Brigade decisions… some way to introduce “chance” “fog of war” and “several impromptus” must be decided by the turn of a friendly (or NOT) card… more in next chapters or Posts… got plenty of those cards (as you will see).

BUT

It is a big BUT … my main approach to enjoy myself is acknowledging the fact that everyone of those little toy soldiers KNOWS perfectly why he is there… to fight the enemy… everyone of them is holding to his musket and saying his prayers… but he is determined to fight it out! (So no need to encourage them at all to do their business… they know)… When those Armies met it is for deciding an outcome (Lee’s first Invasion… say no more… read History… no place here for History lessons)… (McClellan worried to lose the engagement and permit the fall of Washington!… always too worried by the numbers of the enemy!).

If you follow this posts you will see my trial and error… I do not care to make mistakes… I am learning myself!

So there you are… enjoy the eye candy!

Hooker’s Corps moving into the fray (there is no fray yet of course… but they are searching for trouble if you know what I mean)
Lateral view (North limit of North Woods).
Jackson is deploying his extreme left and Stuart’s cavalry is kept back in reserve.

Eagle Eye view of Jackson’s Corps on the Confederate left flankl